
Kina Tutorial
This is an old model of mine designed from 1:4 rectangles. It gets a little tricky to assemble near the end, but creates a very interesting spiky final model.

Step 1
Start with a 1:4 rectangle folded into quarters.

Step 2
Fold the edges to meet the midline as shown.
Step 3
Turn the paper over and bring the two diagonal creases together an crease the middle diagonal.
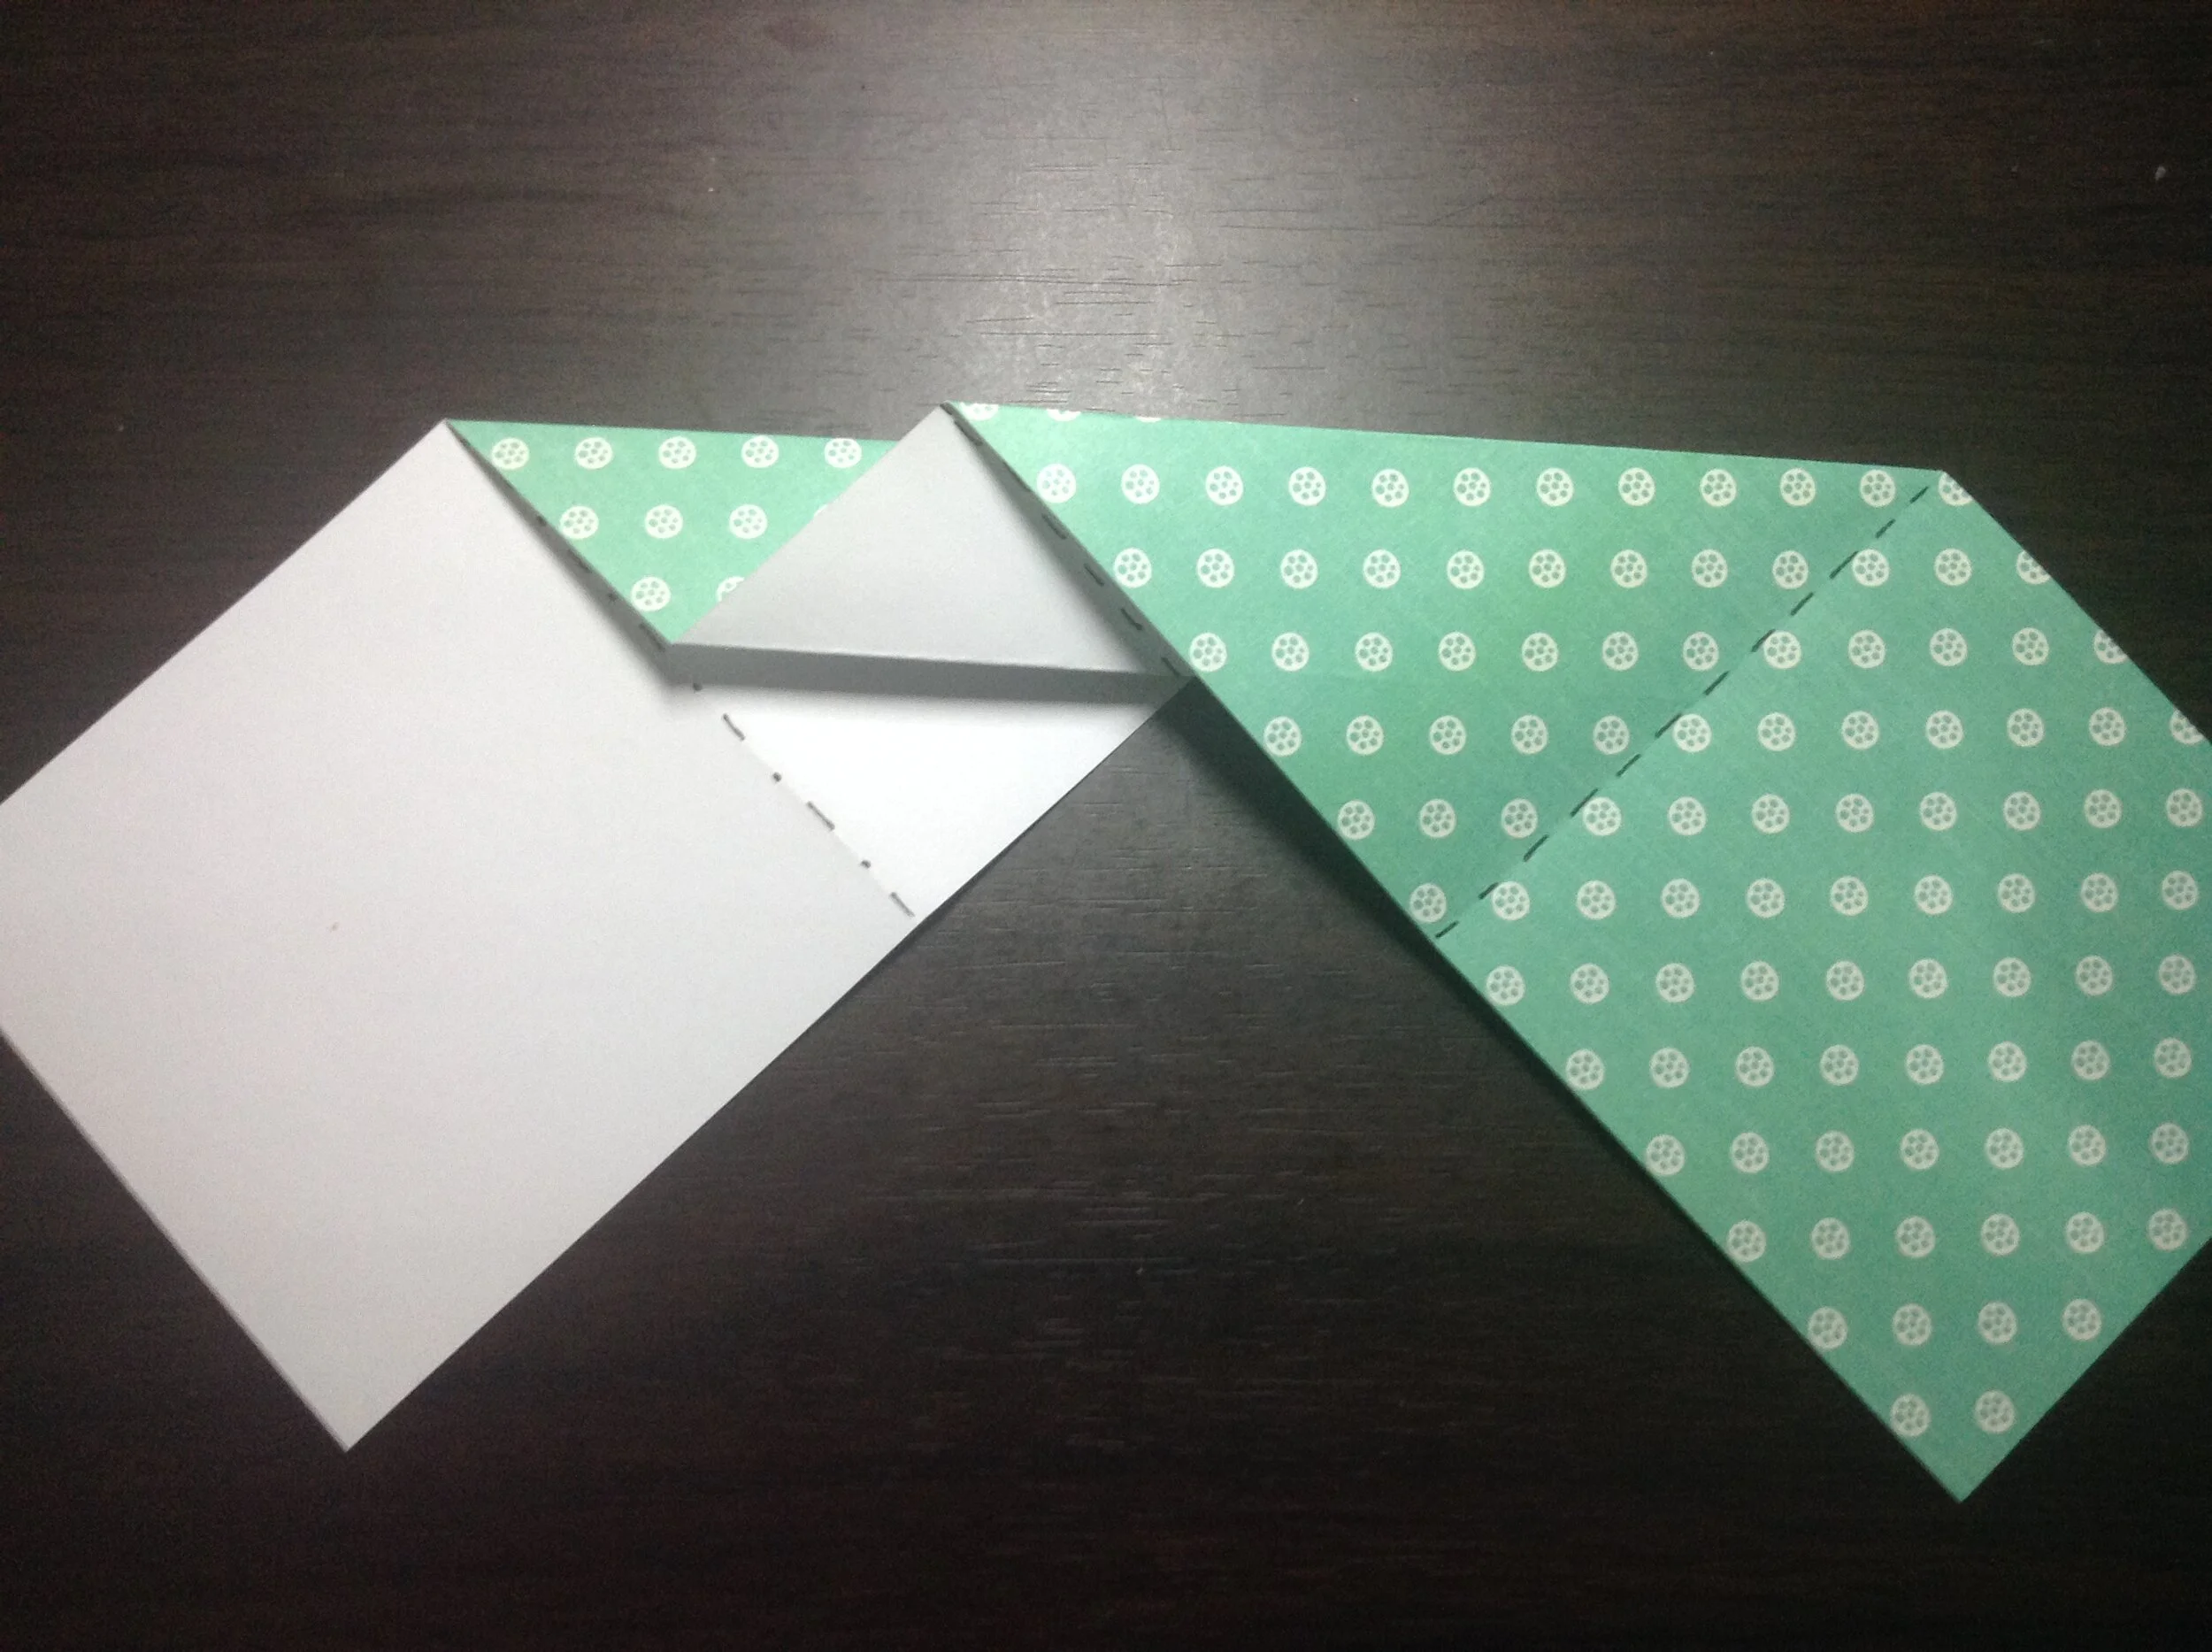
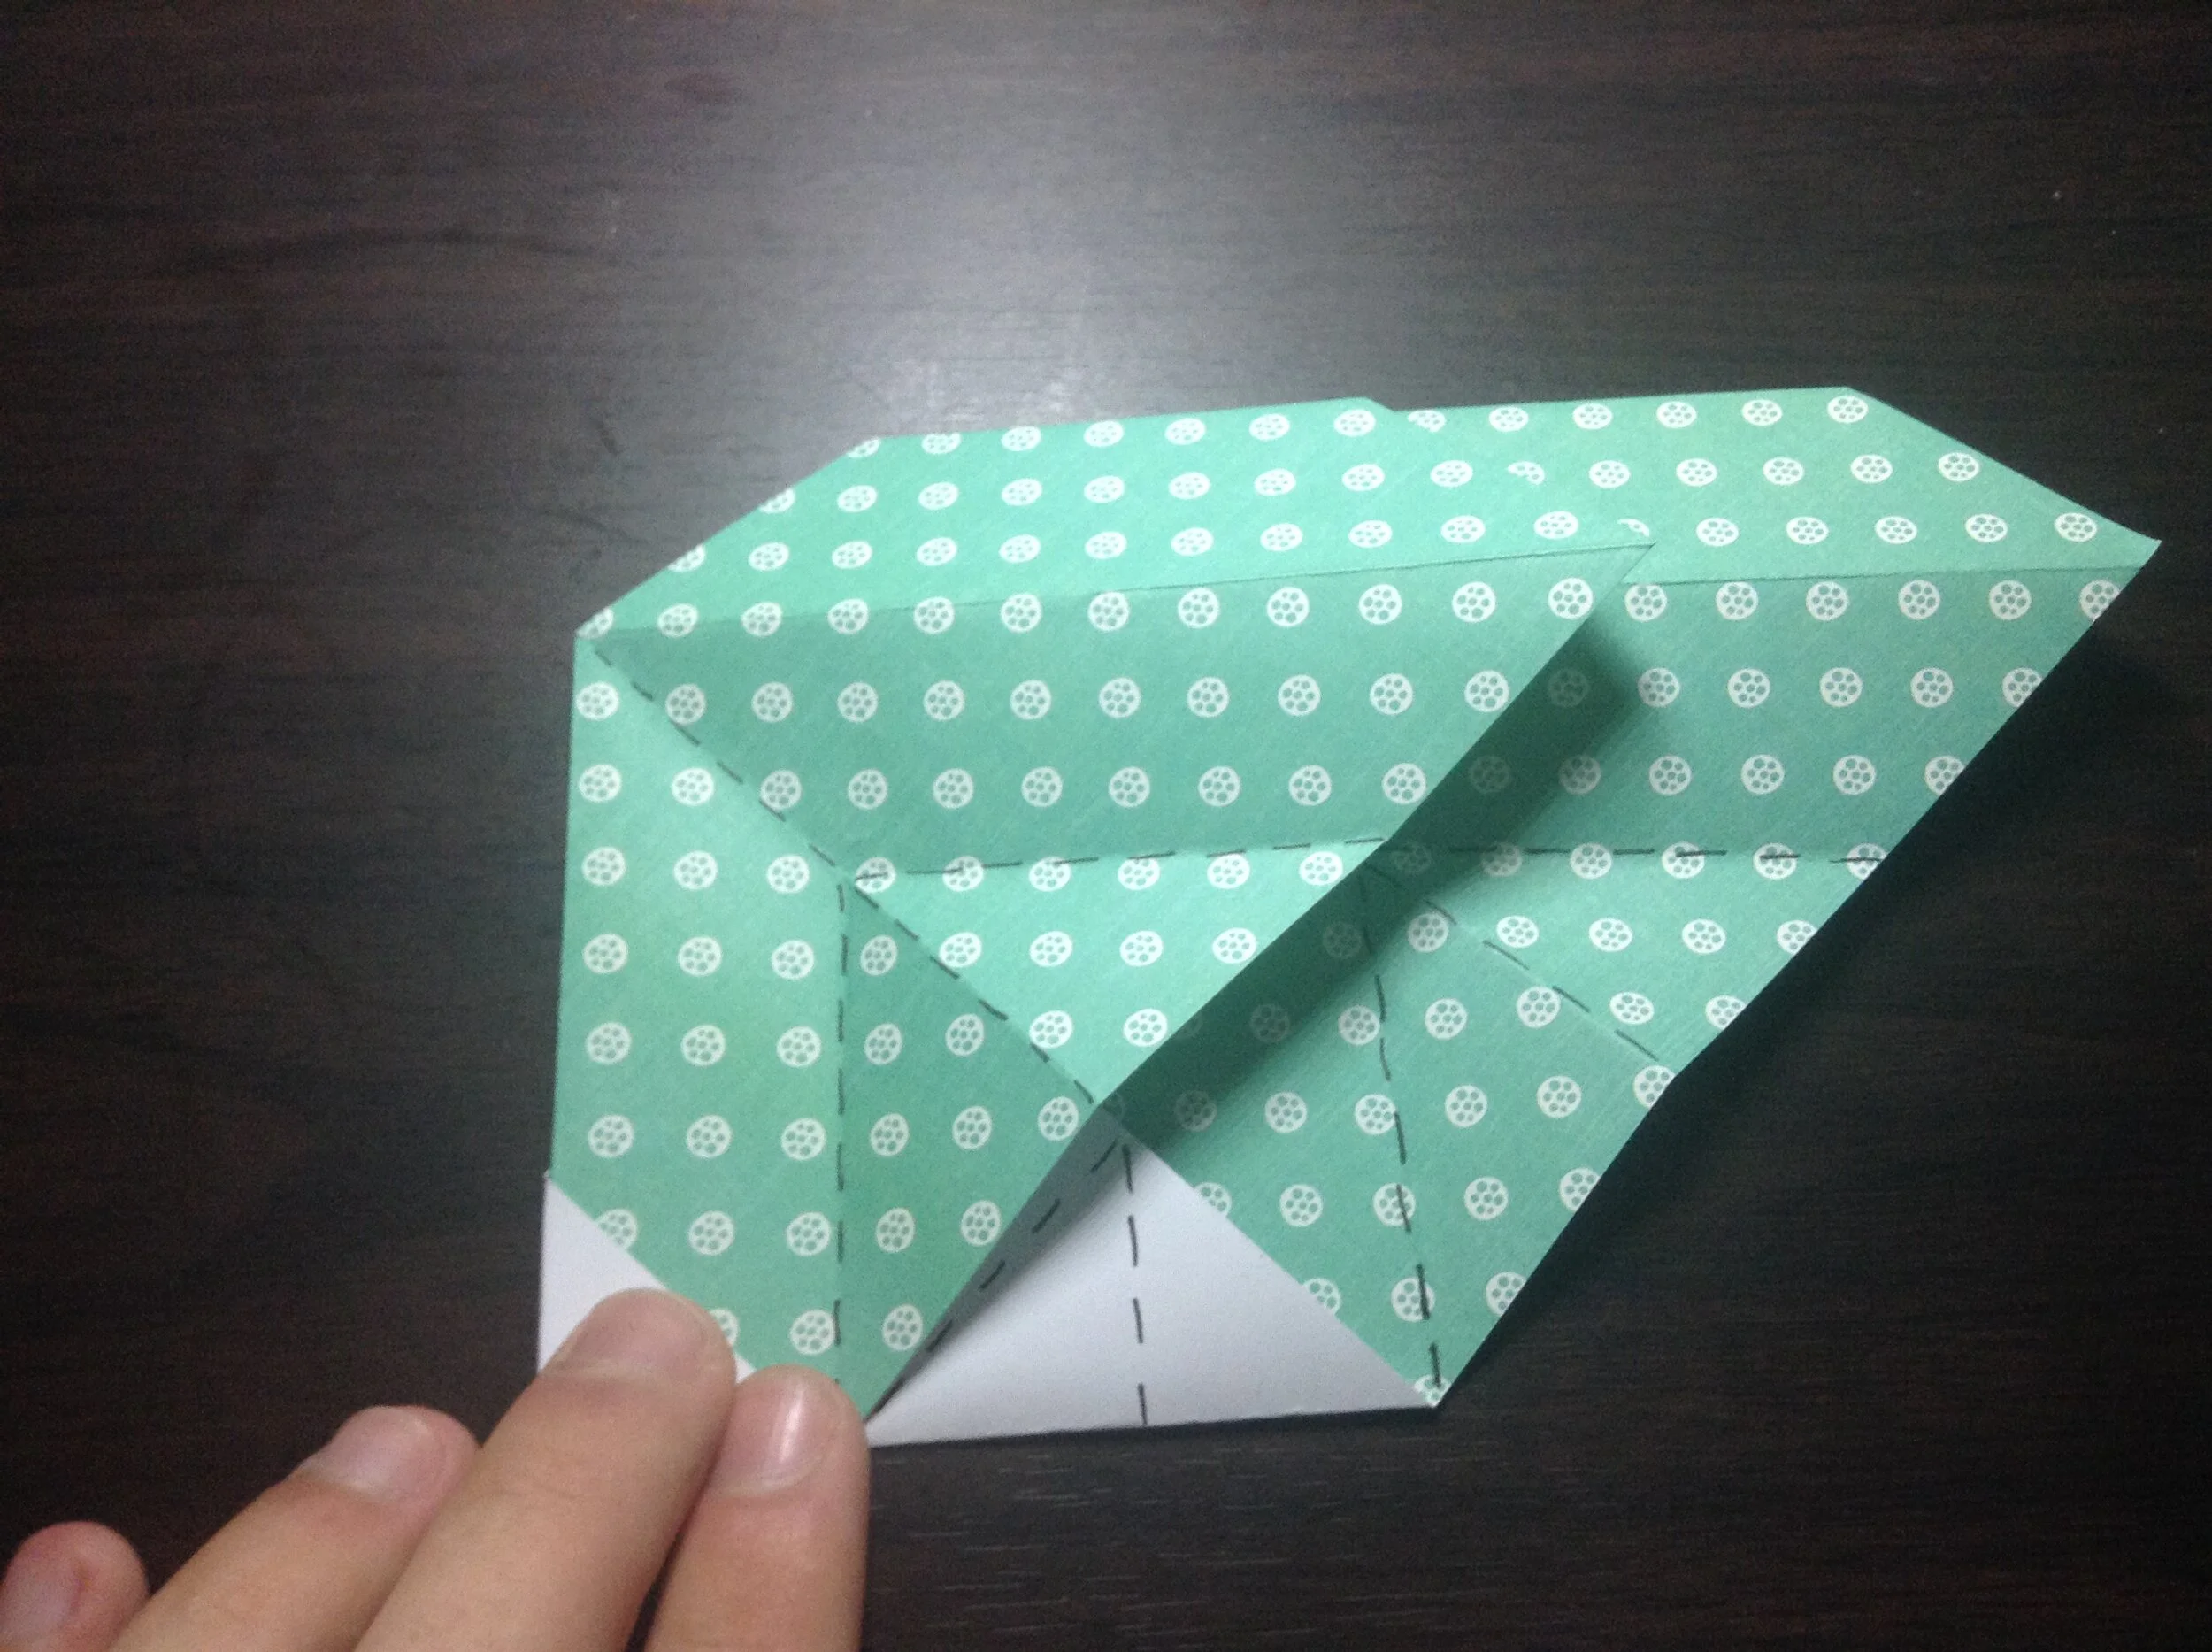
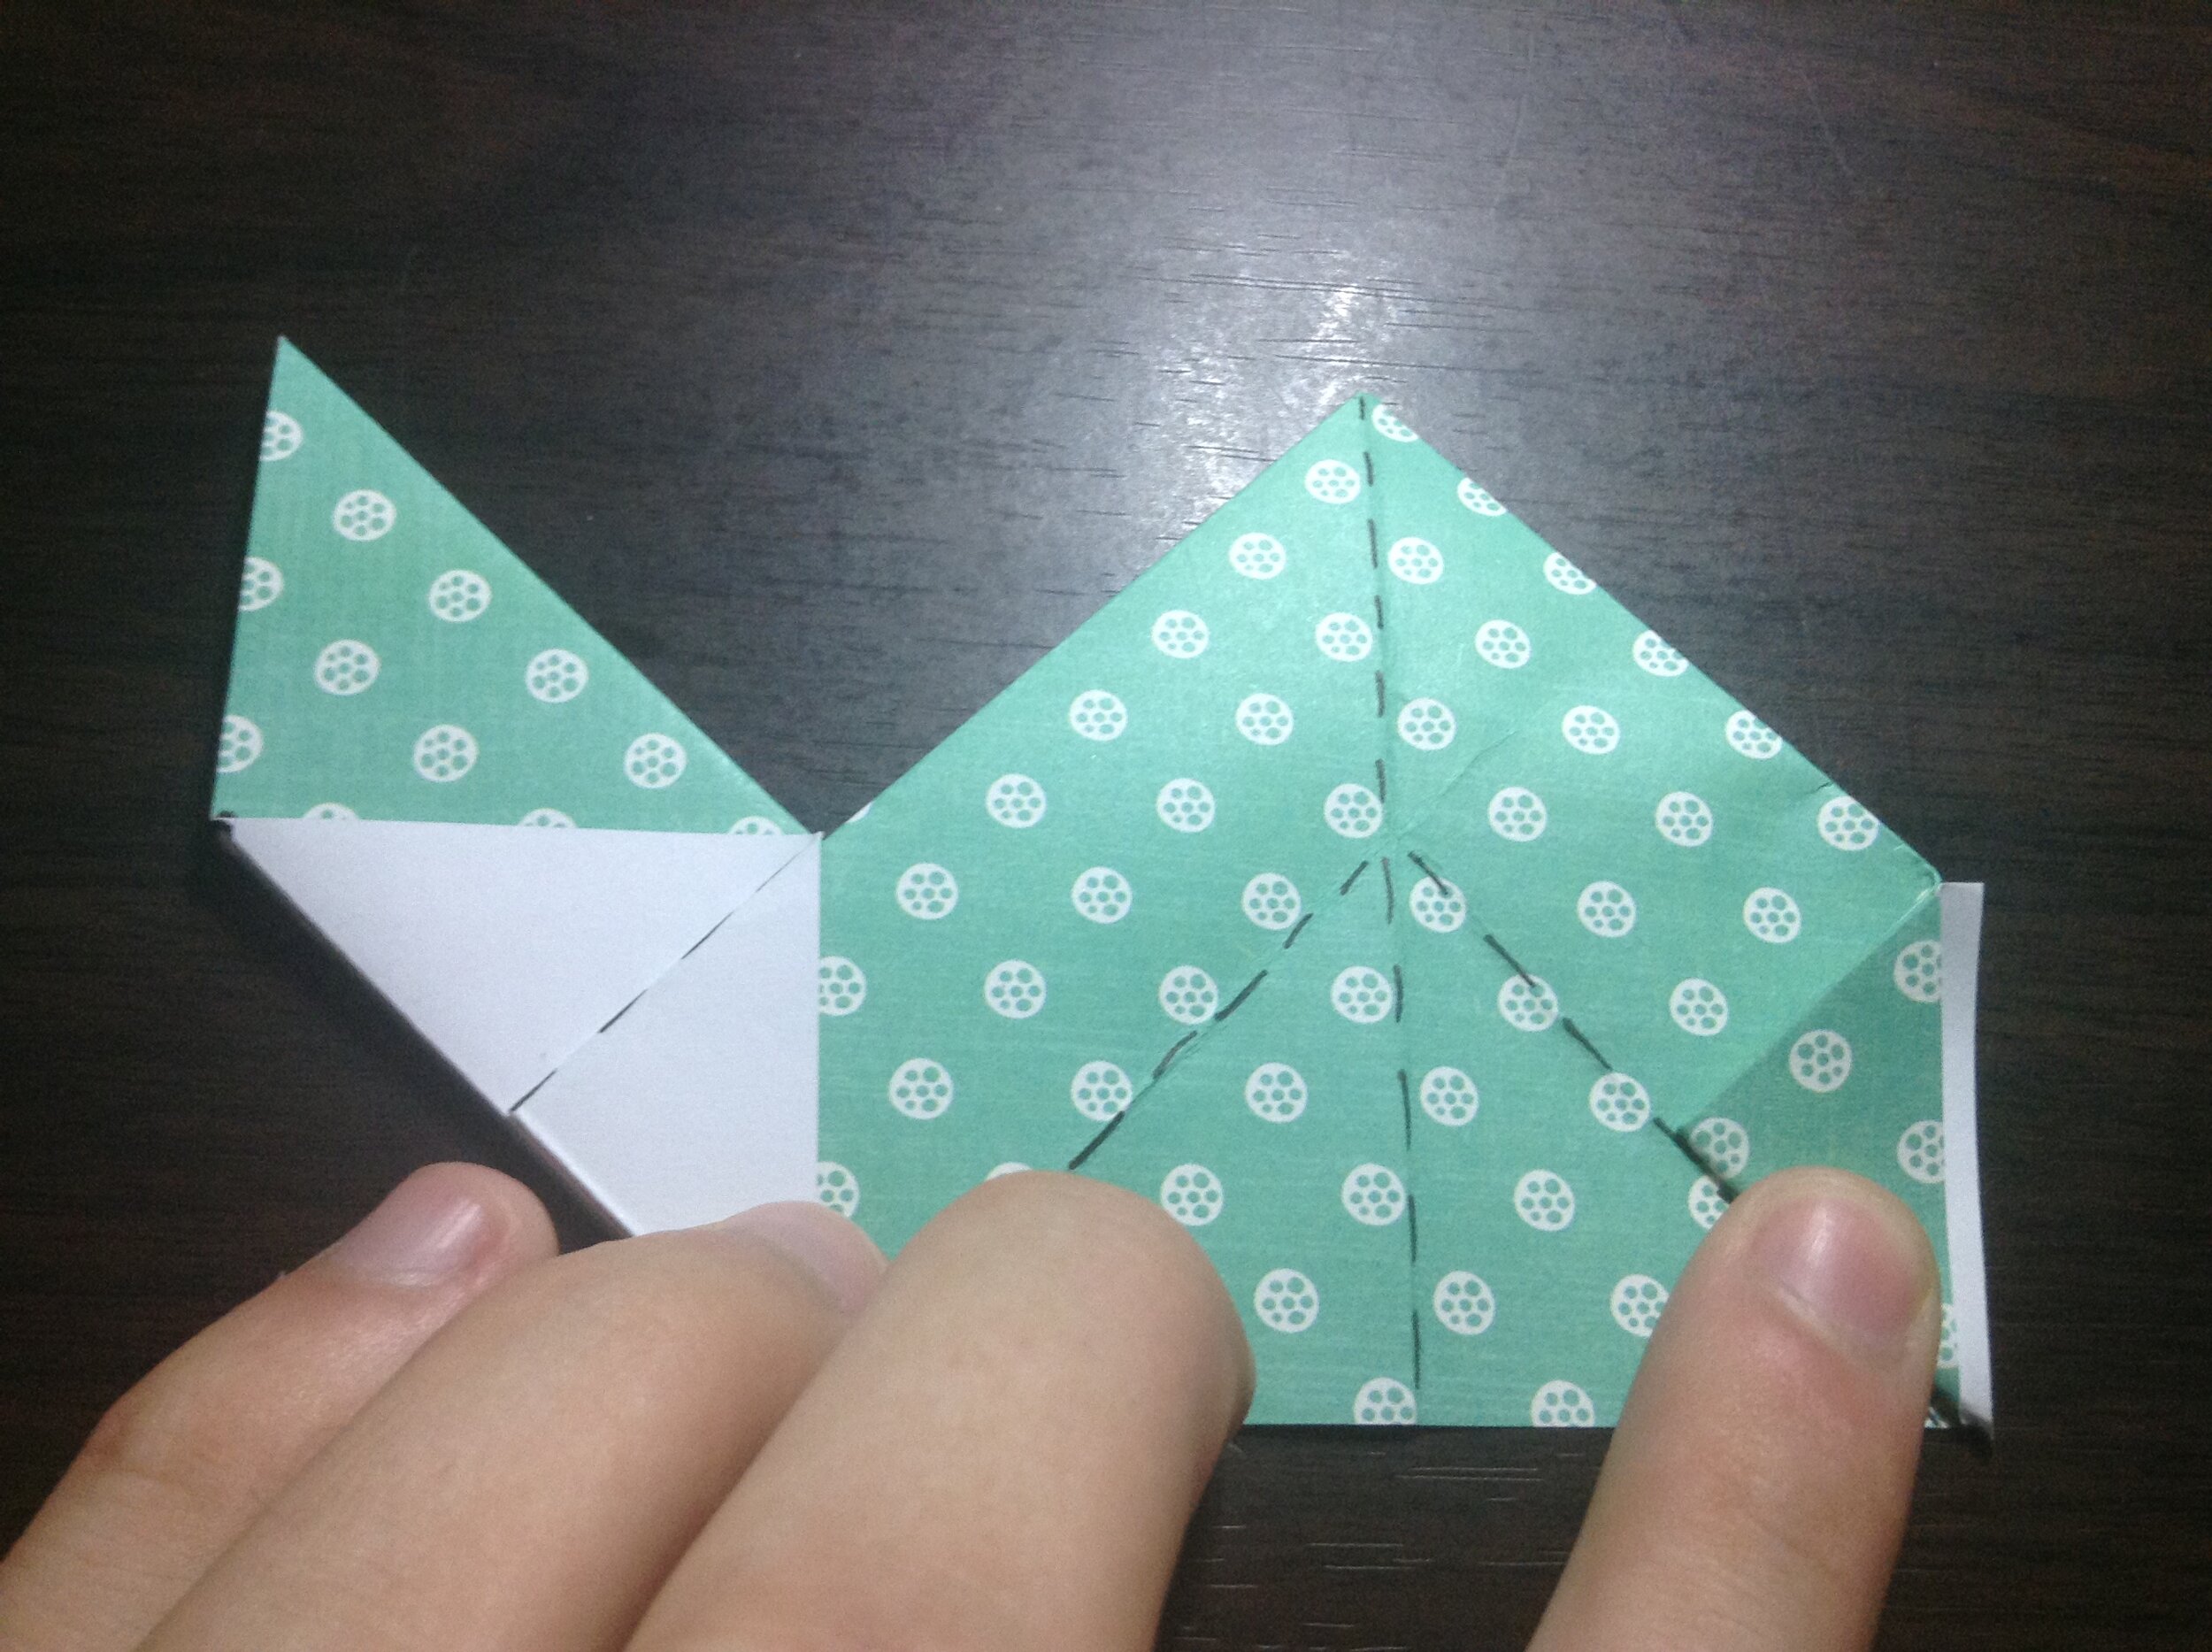
Step 4
Fold up the right side and crease only on the left part of this fold. Note the marked mountain fold to be creased next.

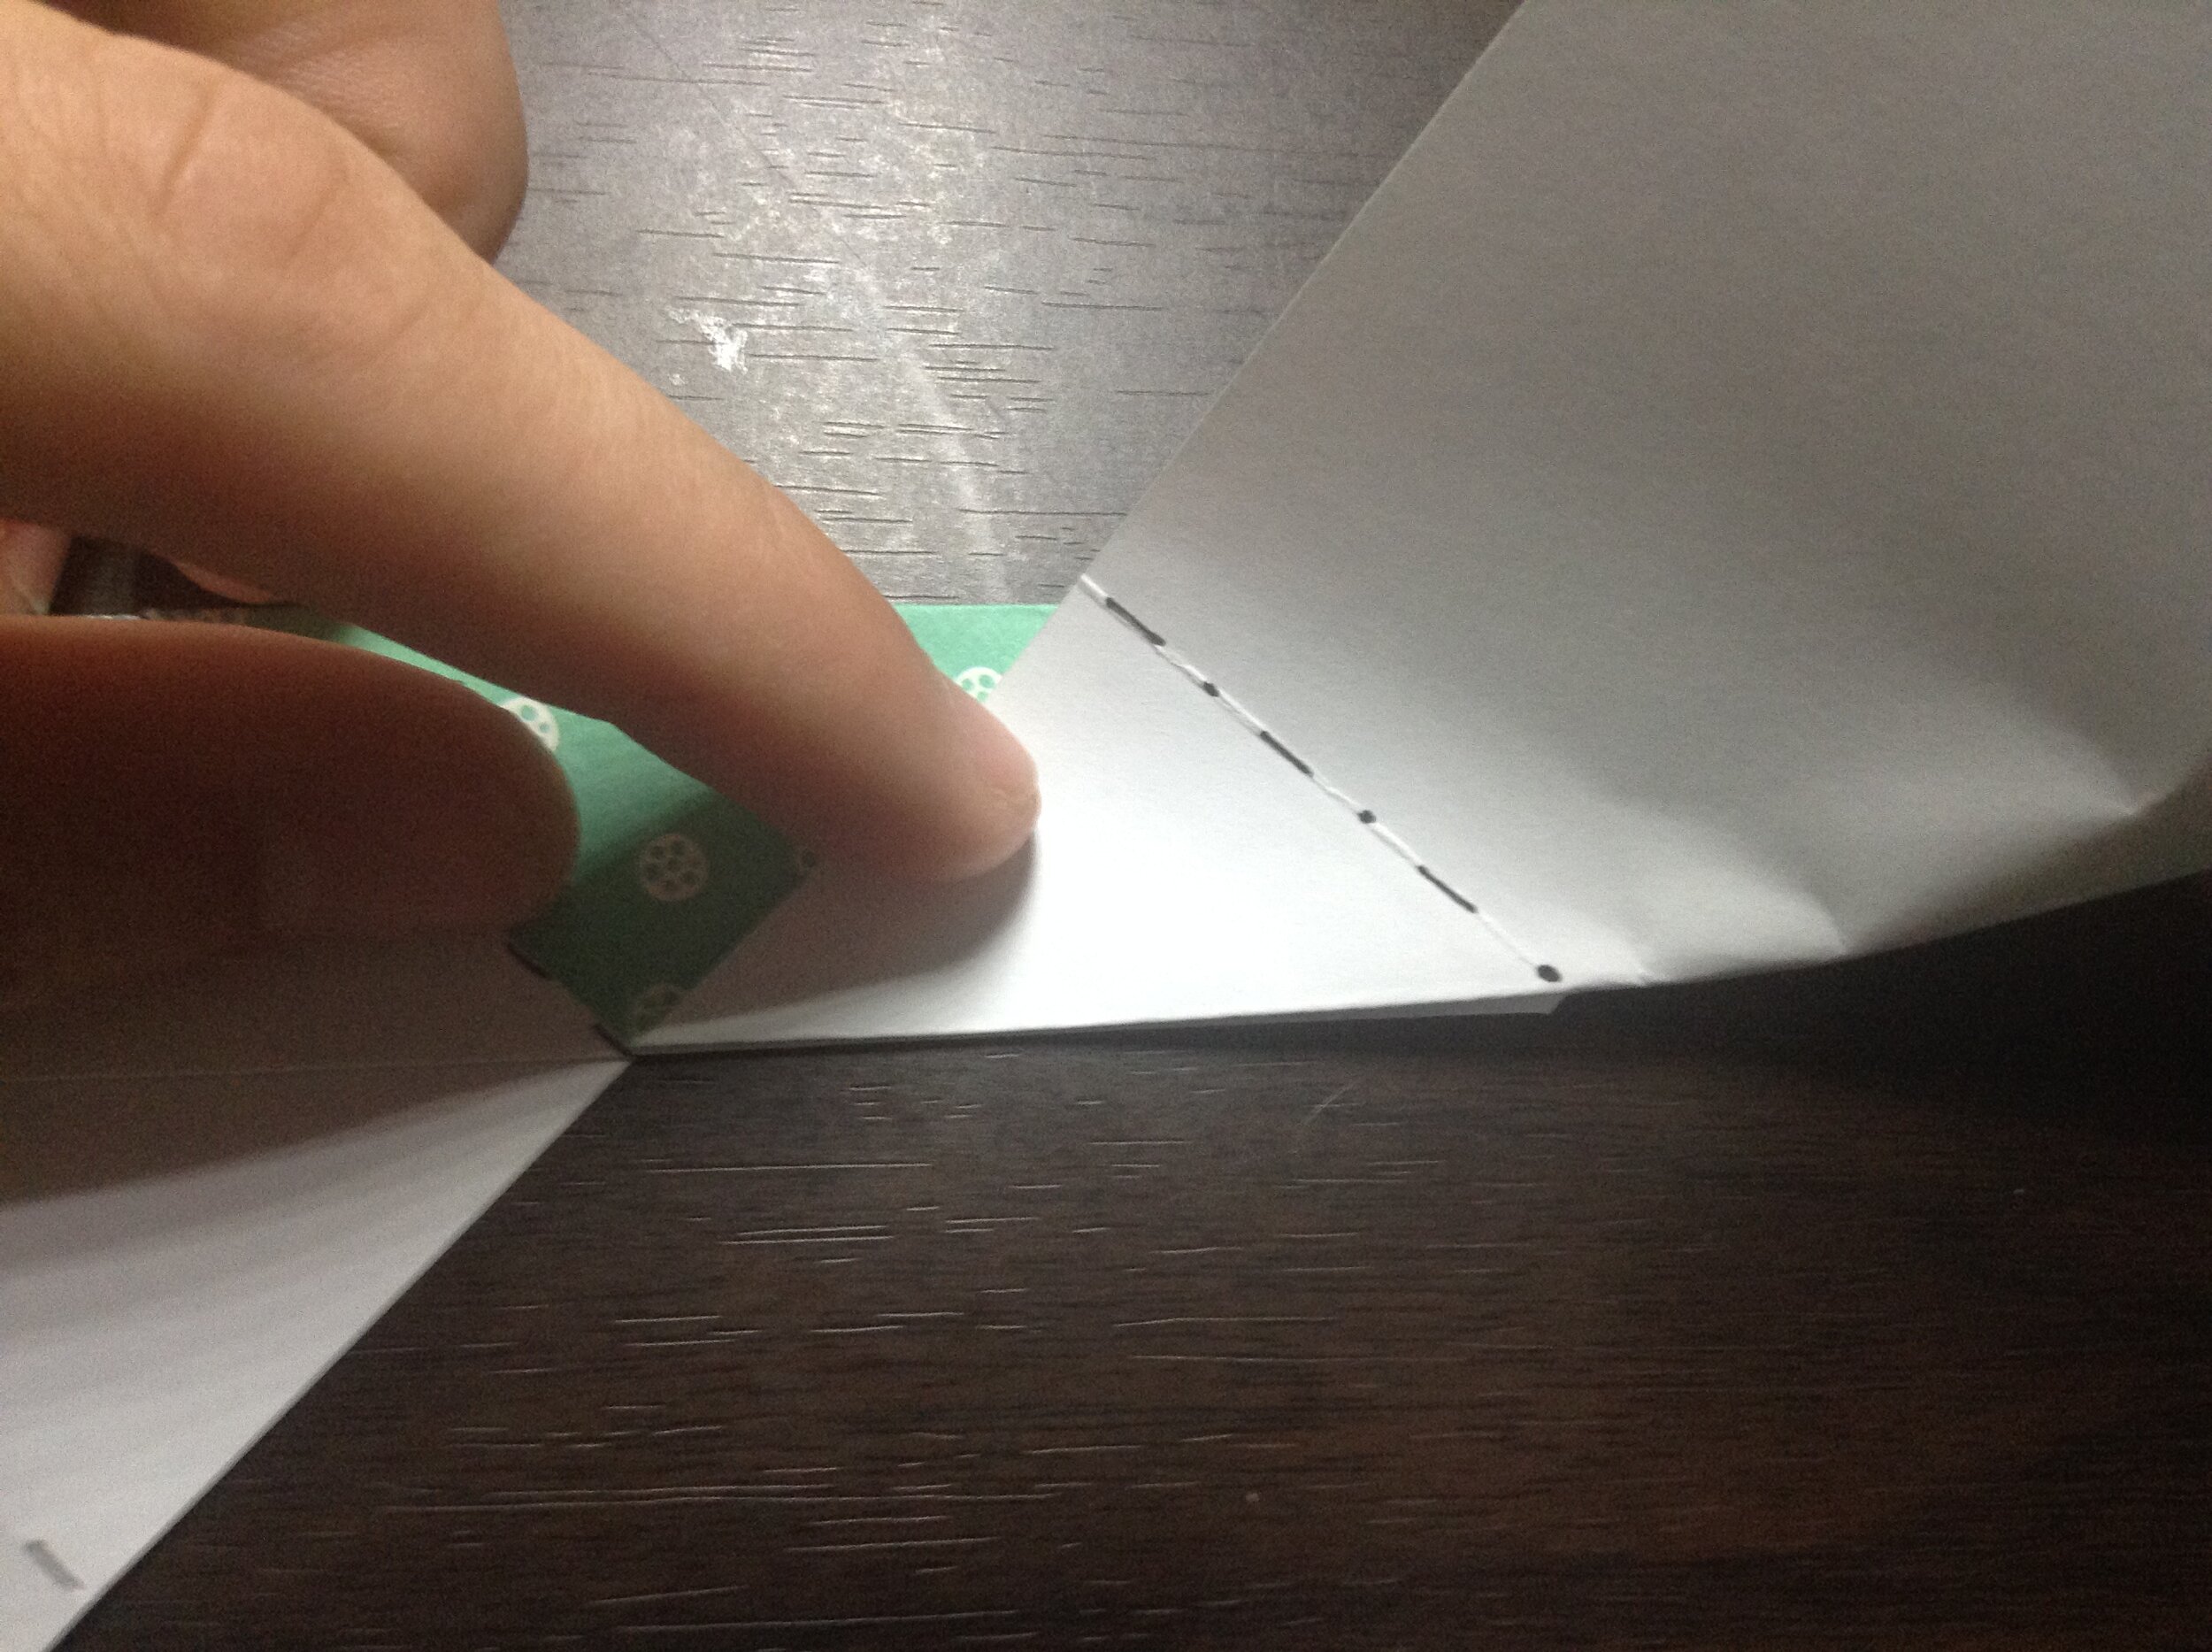
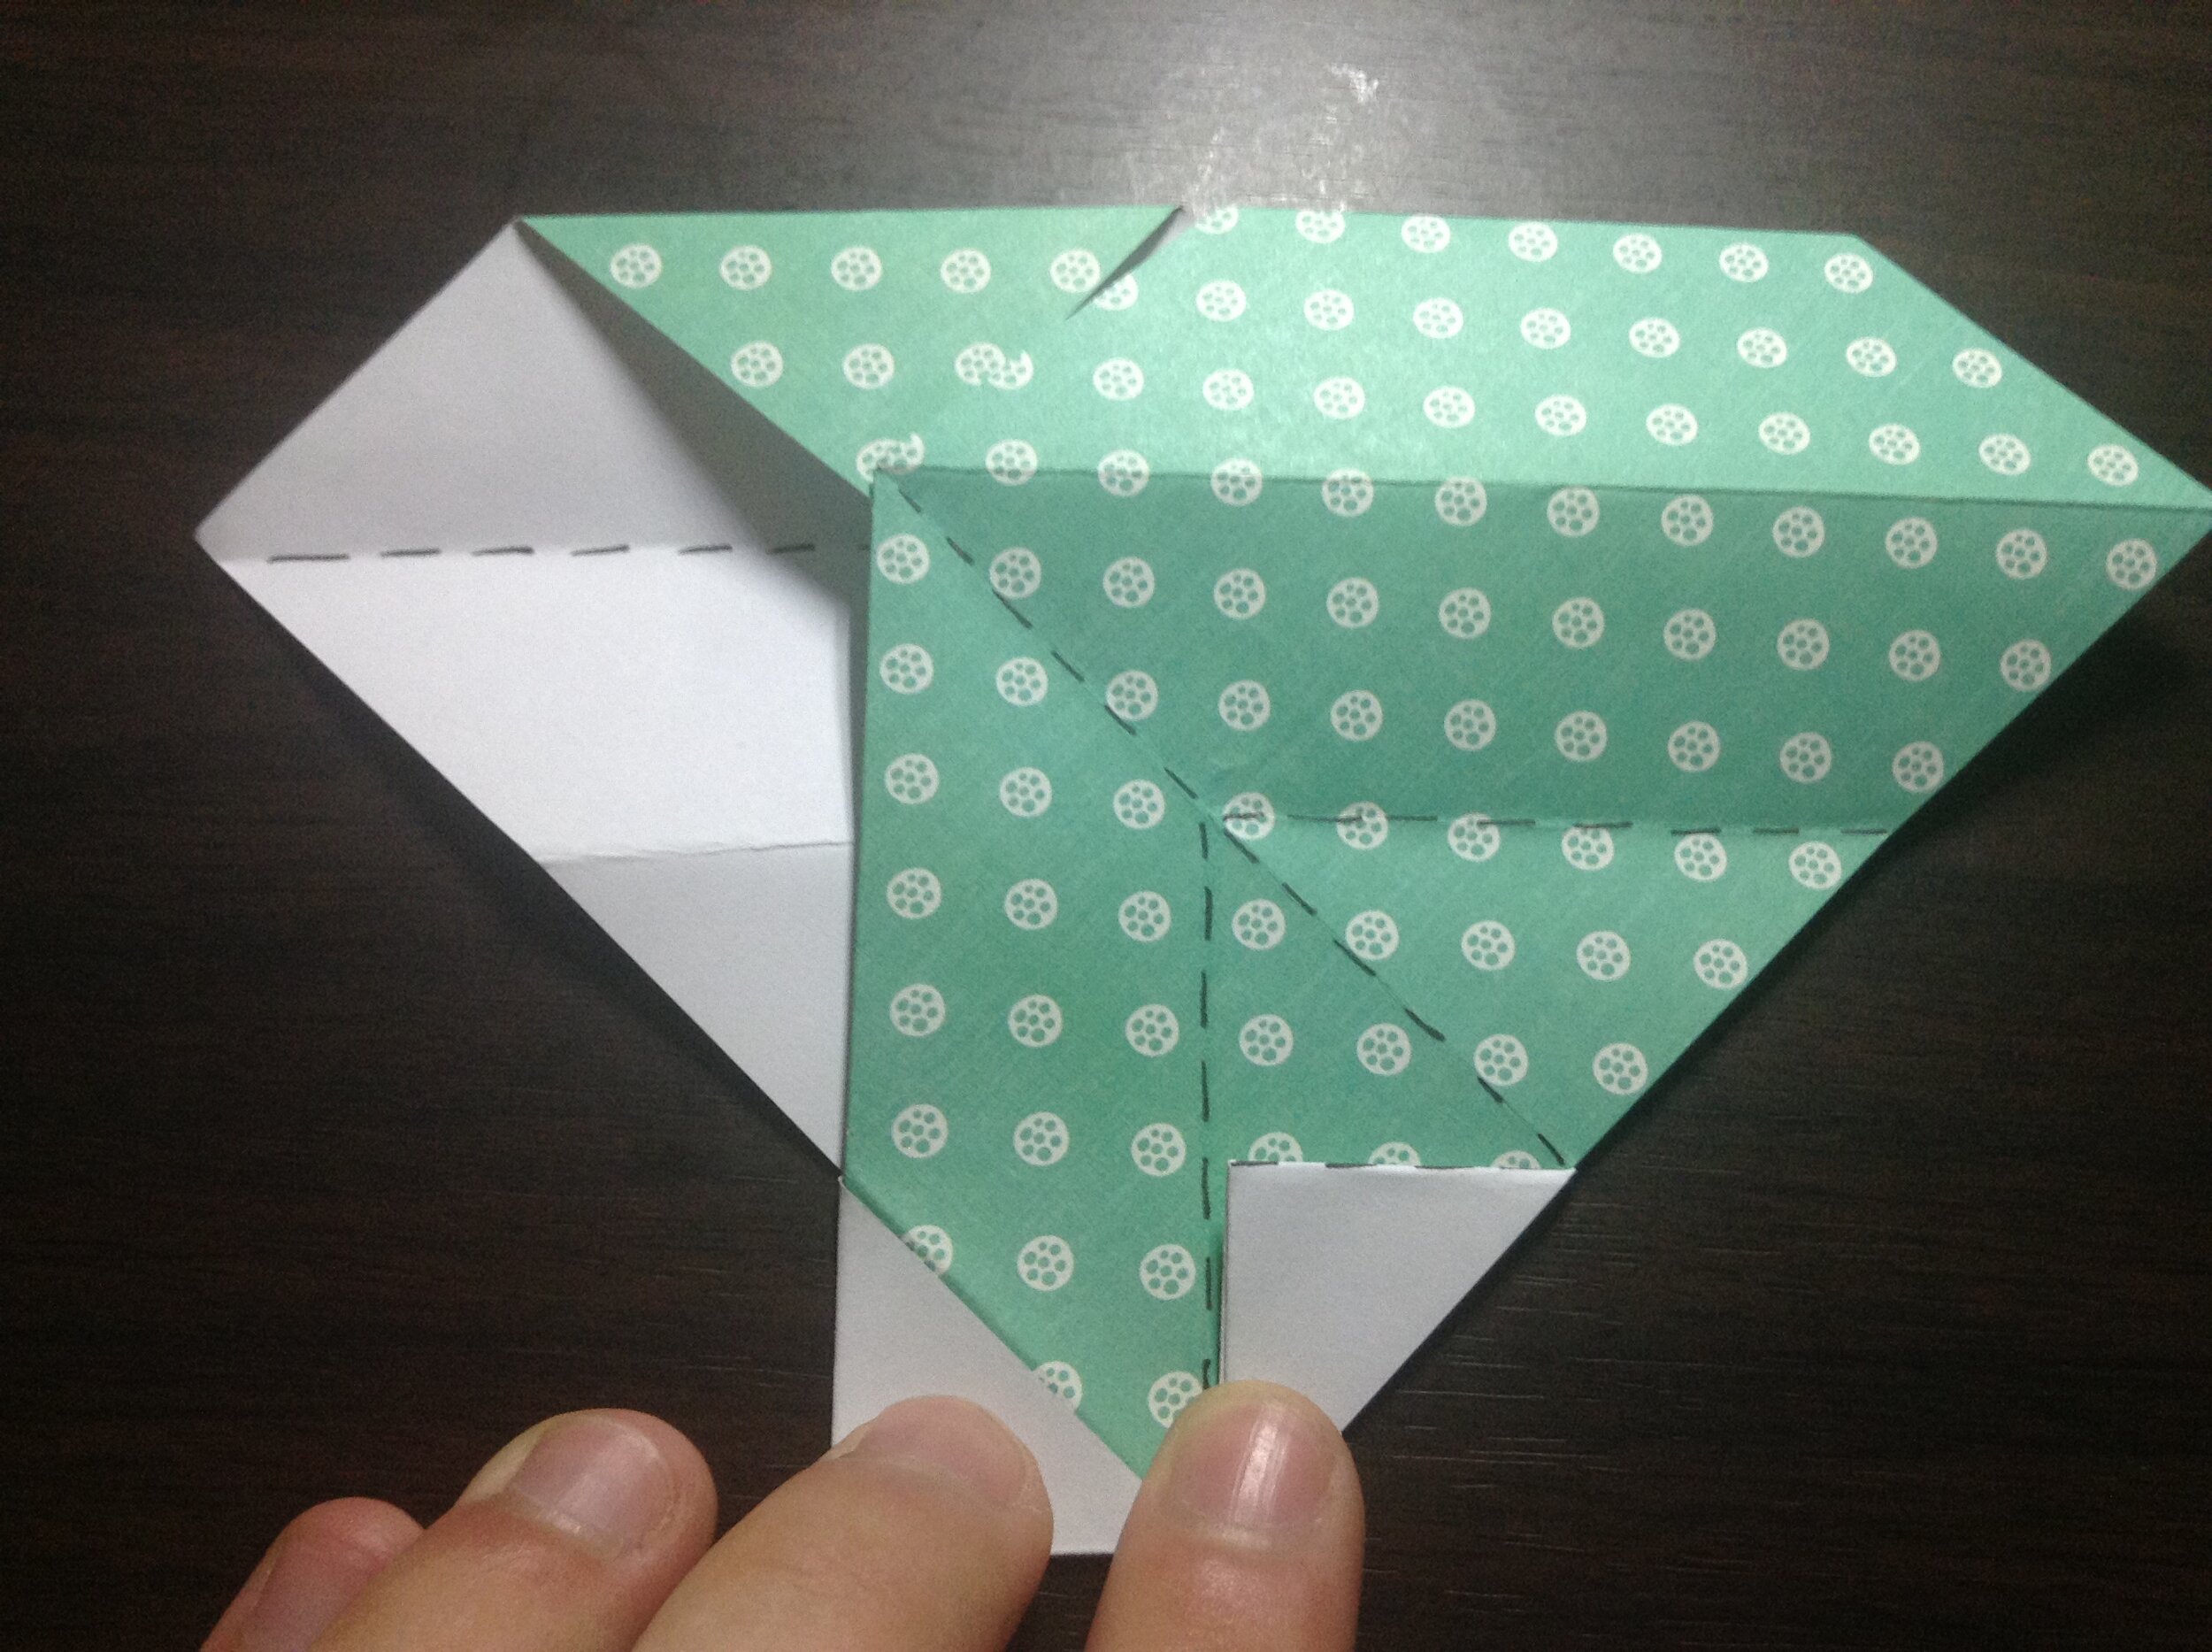
Step 5
Swivel the paper to the left along two existing folds and creating one new crease.
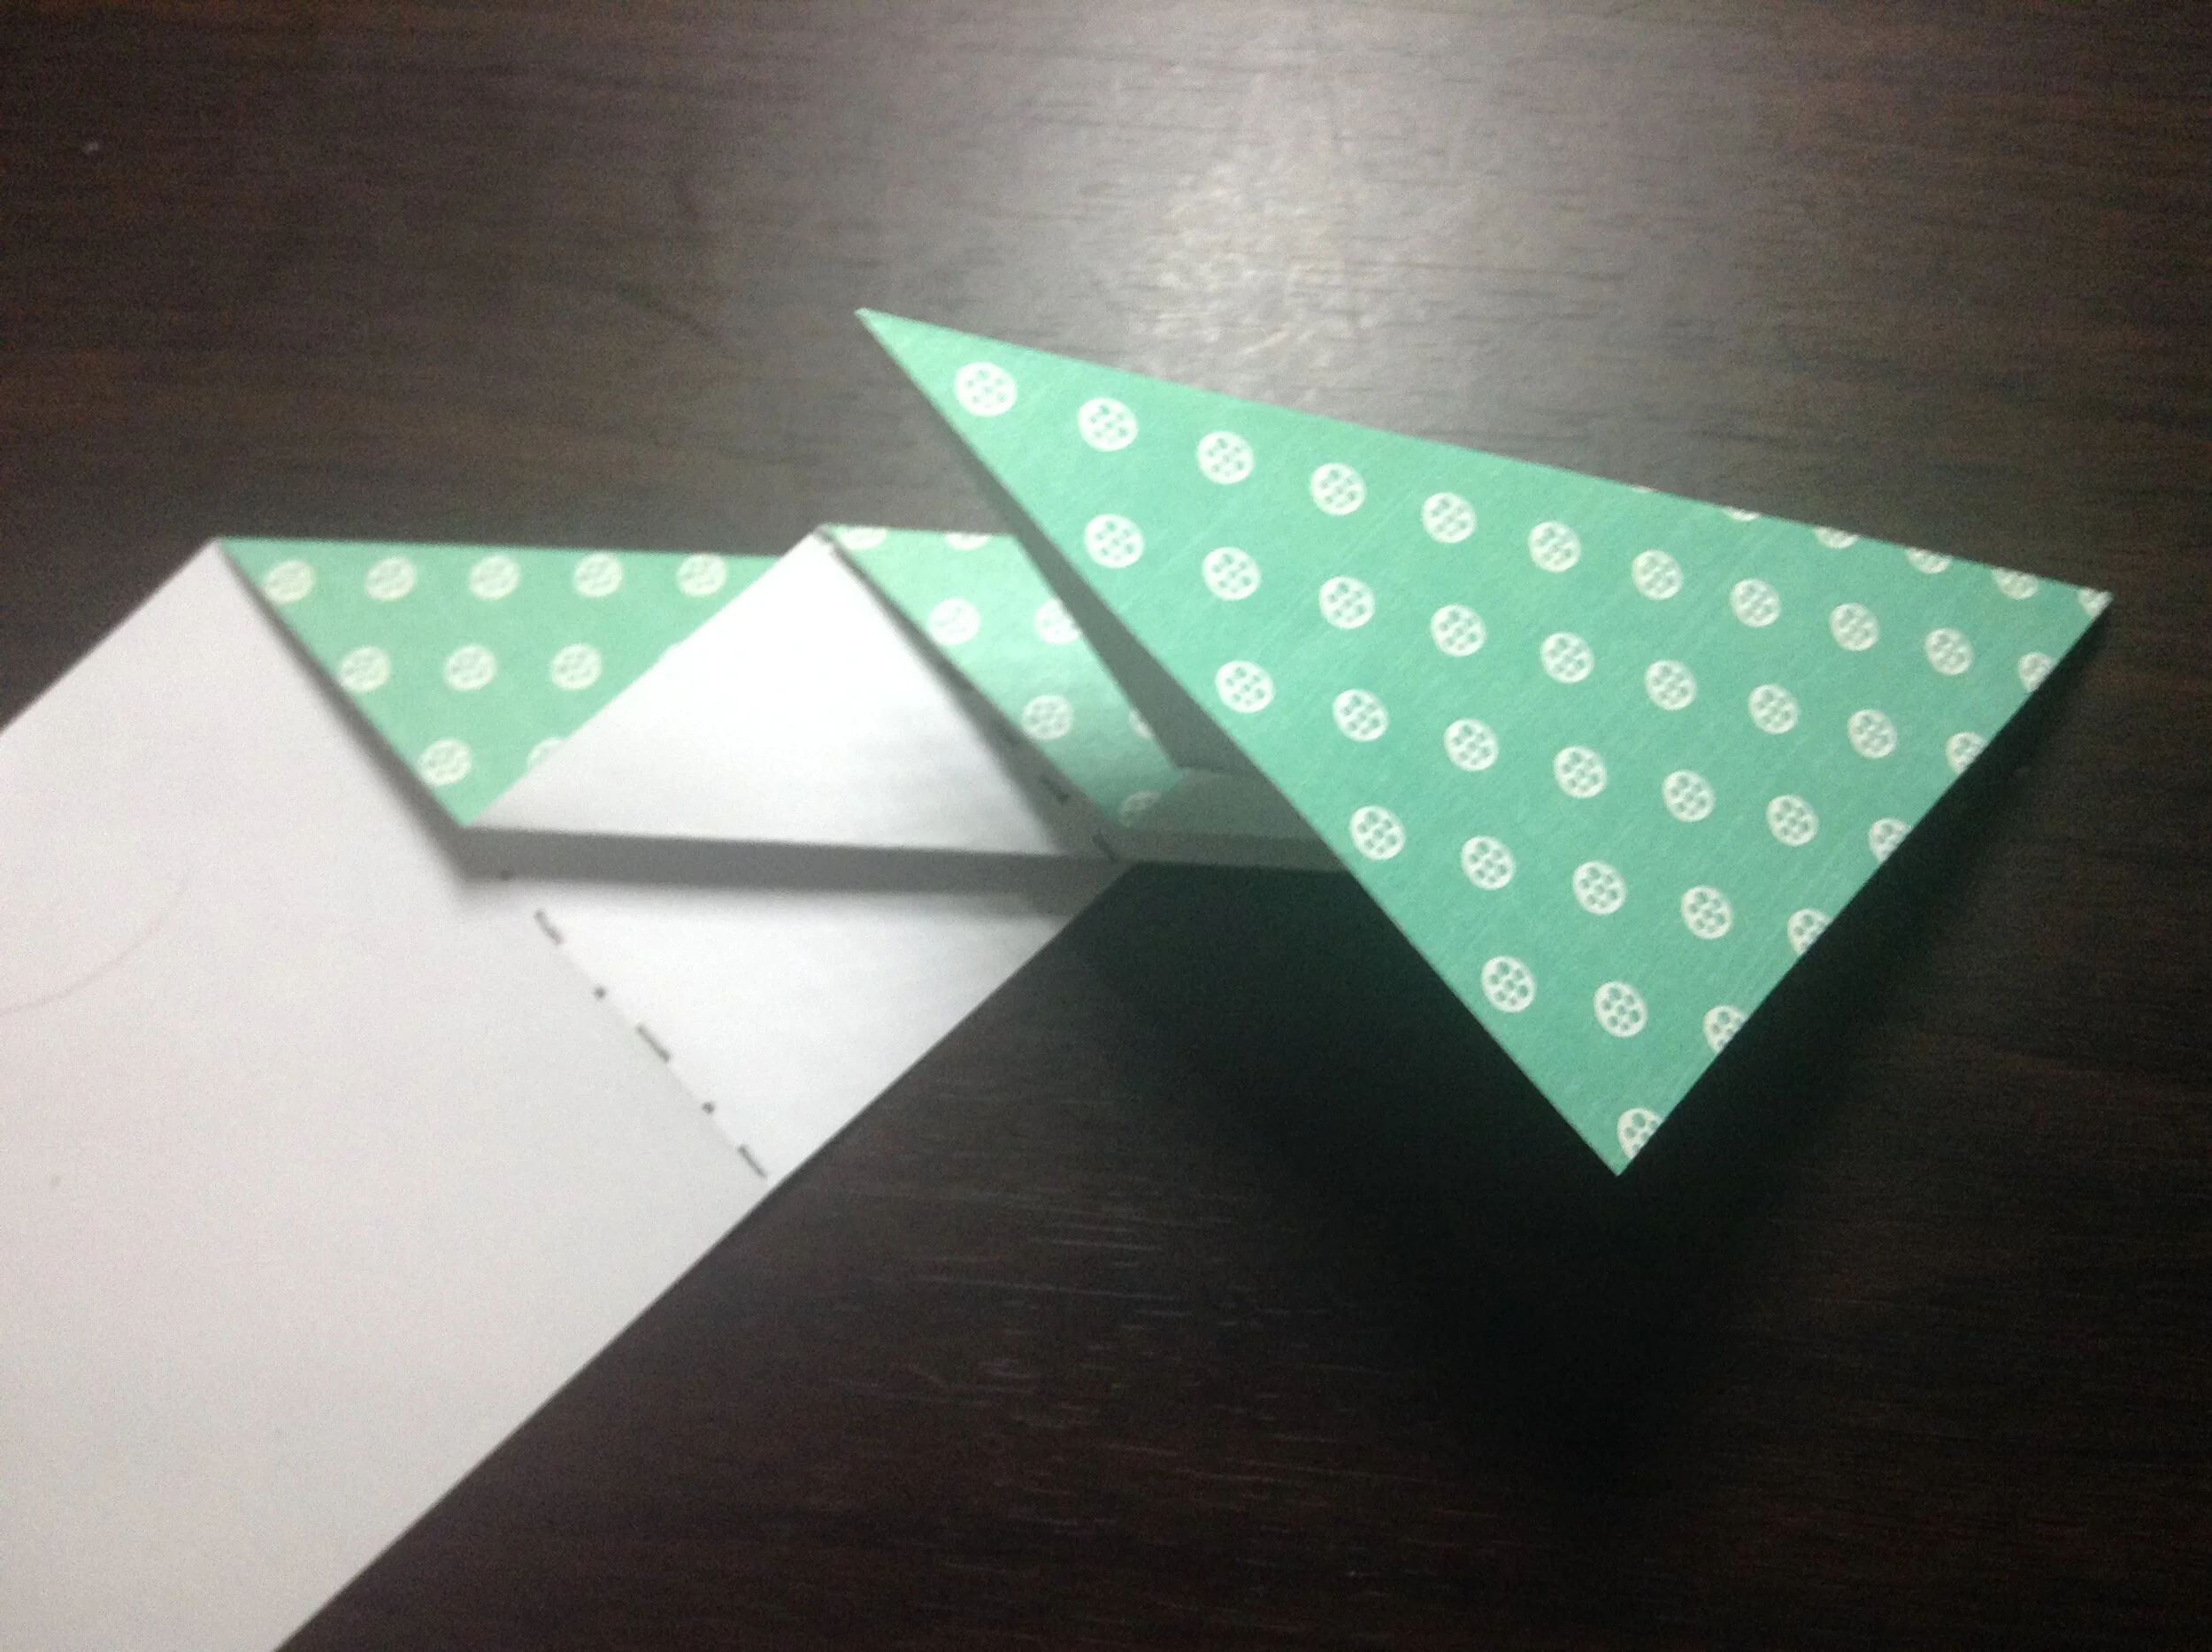
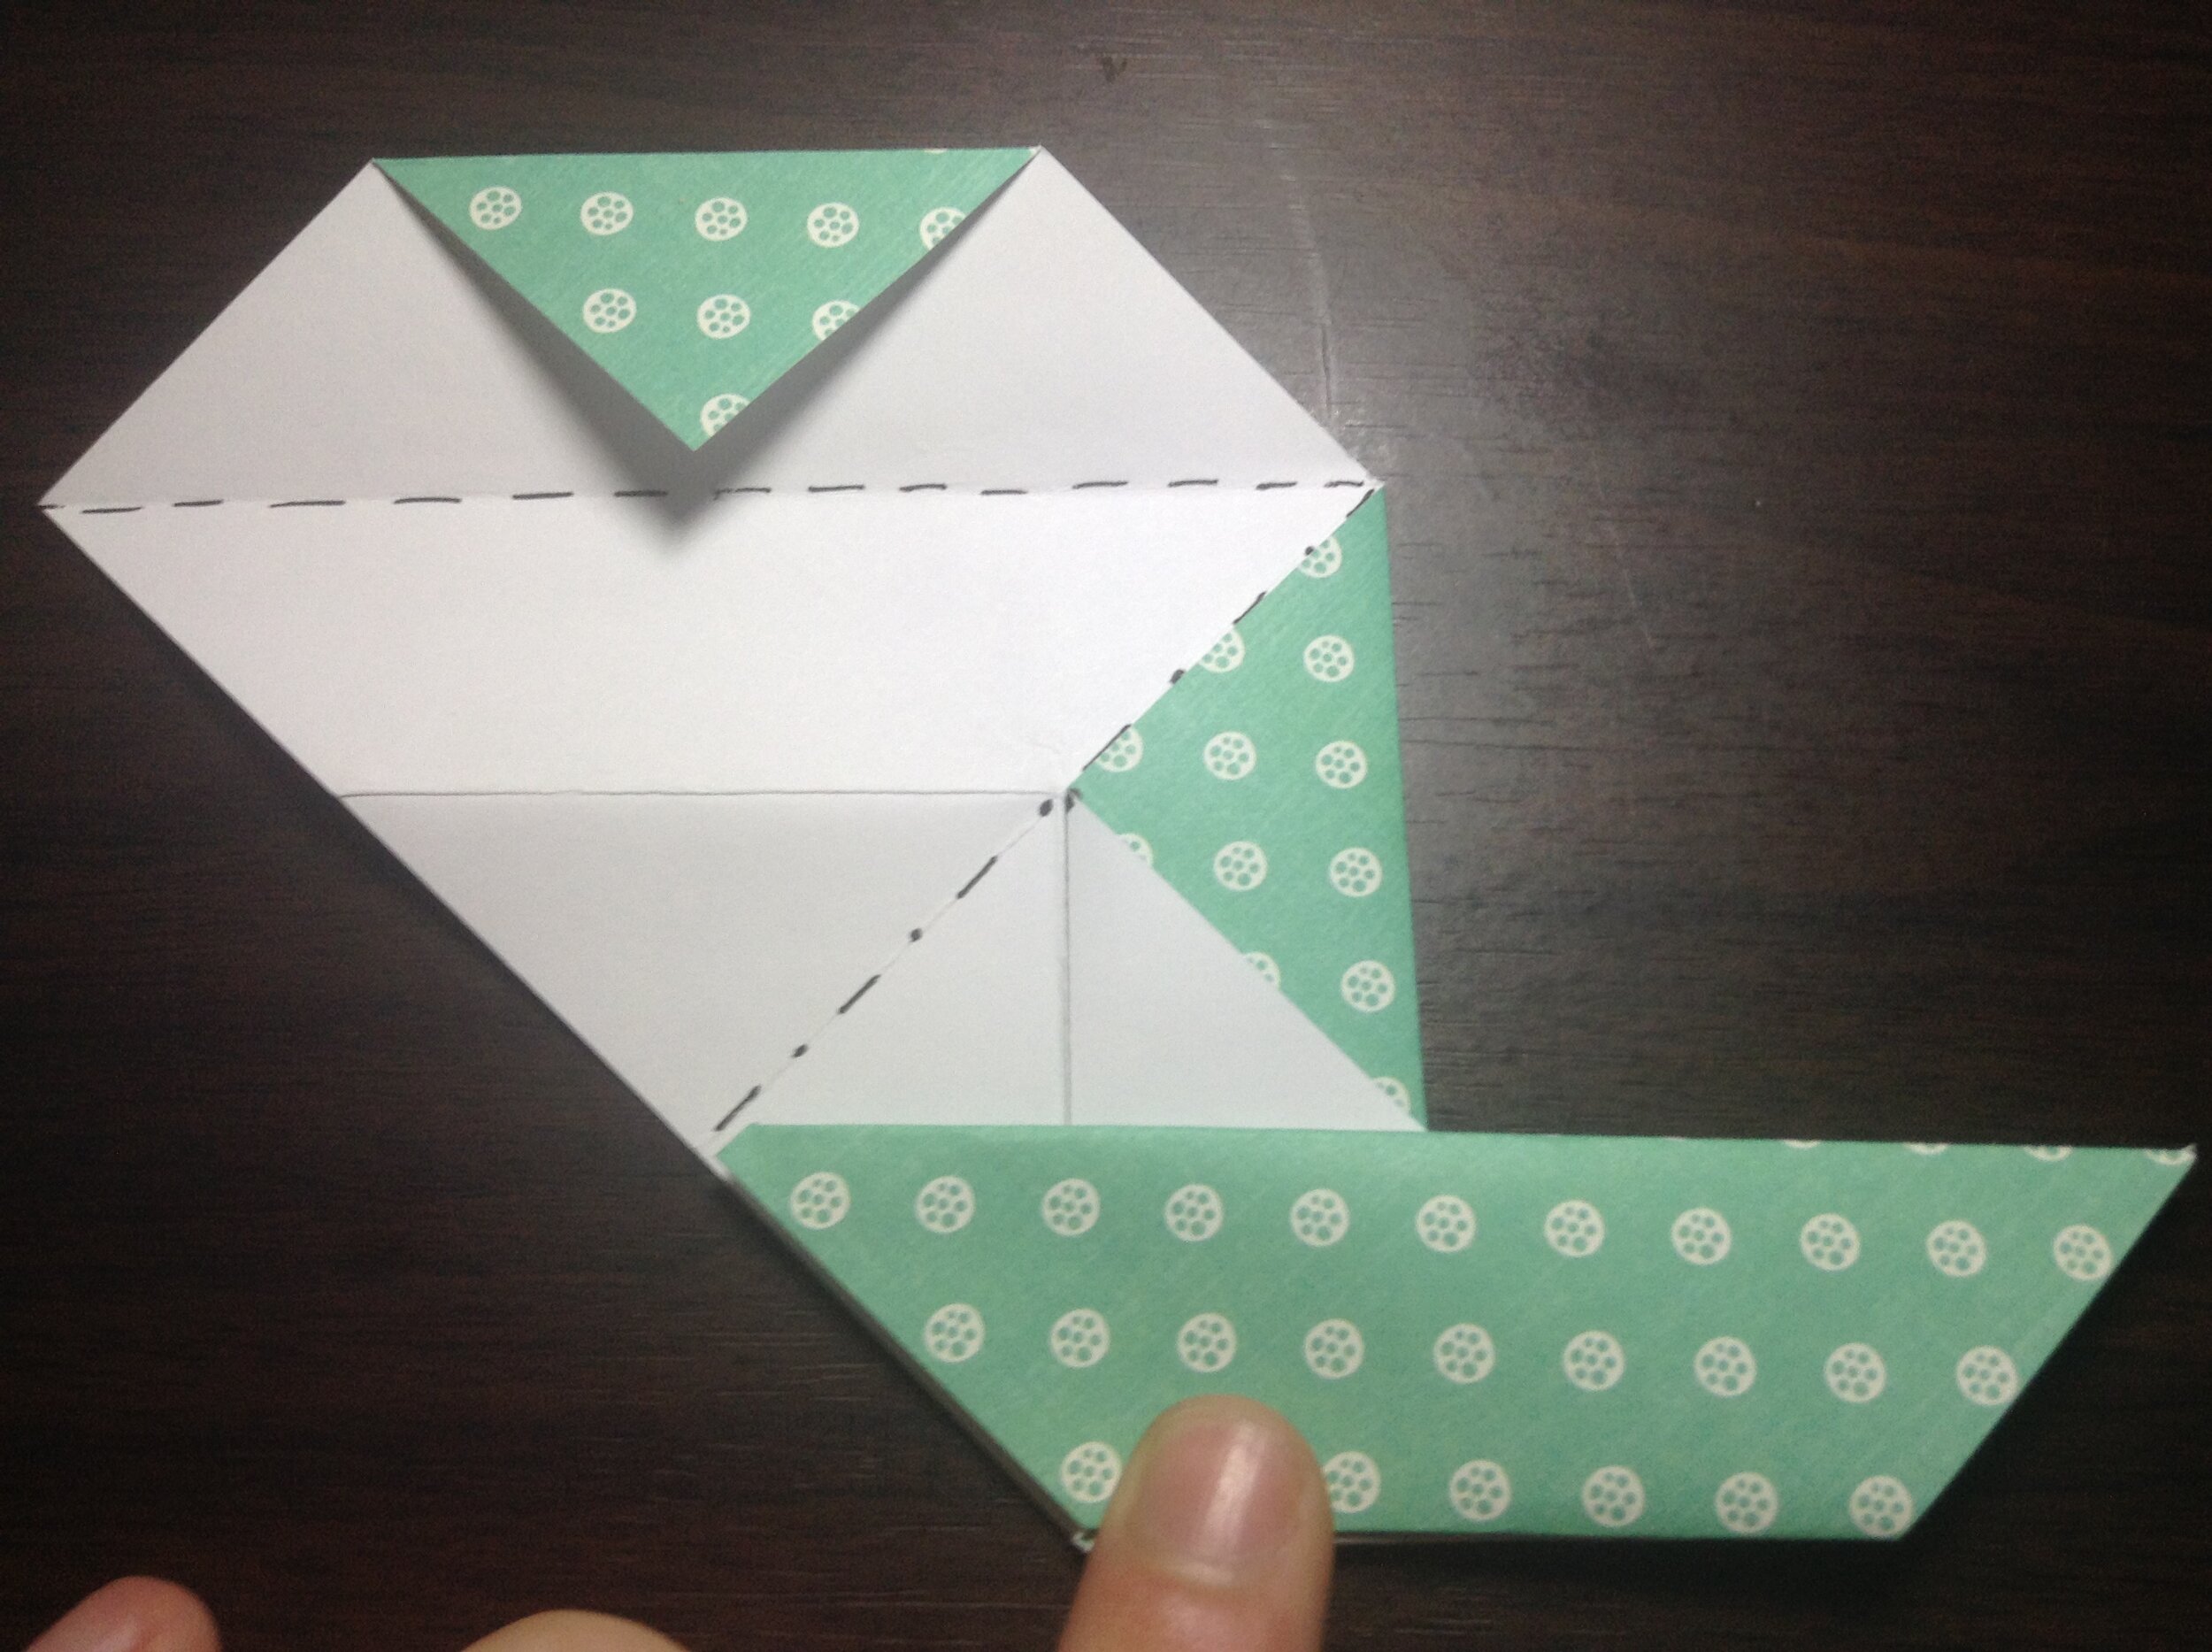
Step 6
Fold down the large triangle.

SteP 7
Fold the tip inside to meet the last crease and so that it matches the other layers.

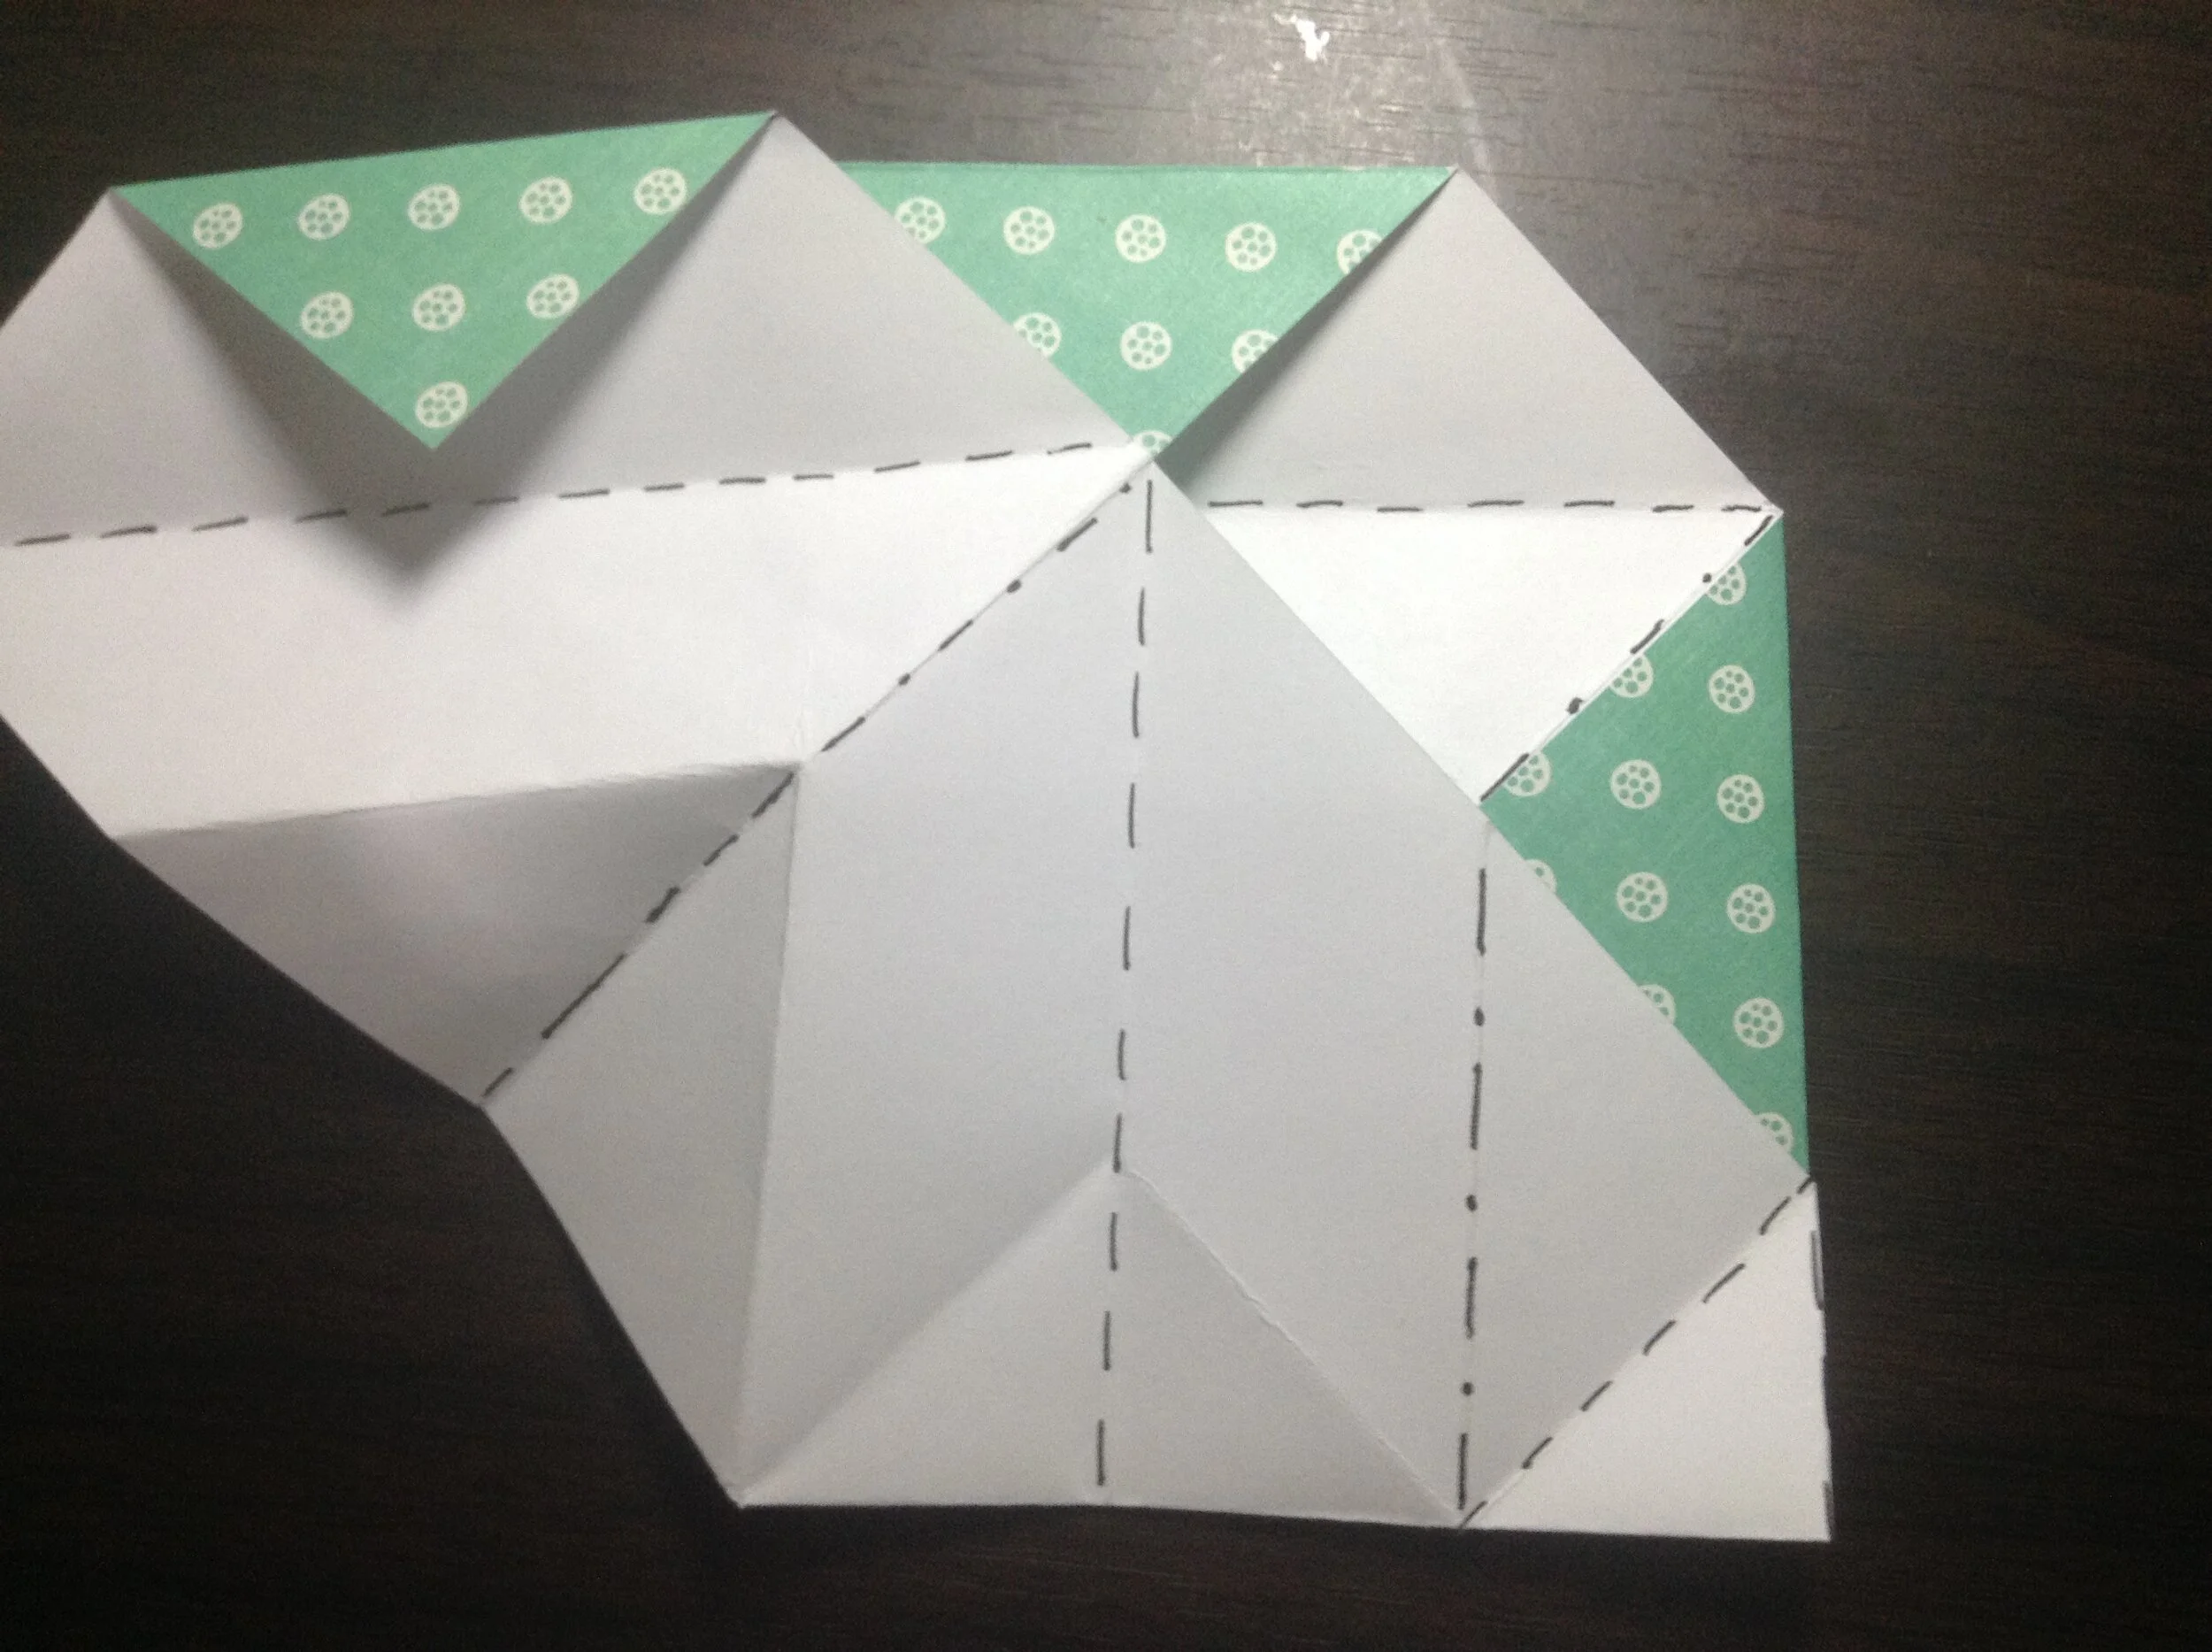
Step 8
Repeat steps 4-7 on the other side. Then unfold everything except the small folds made in step 7.

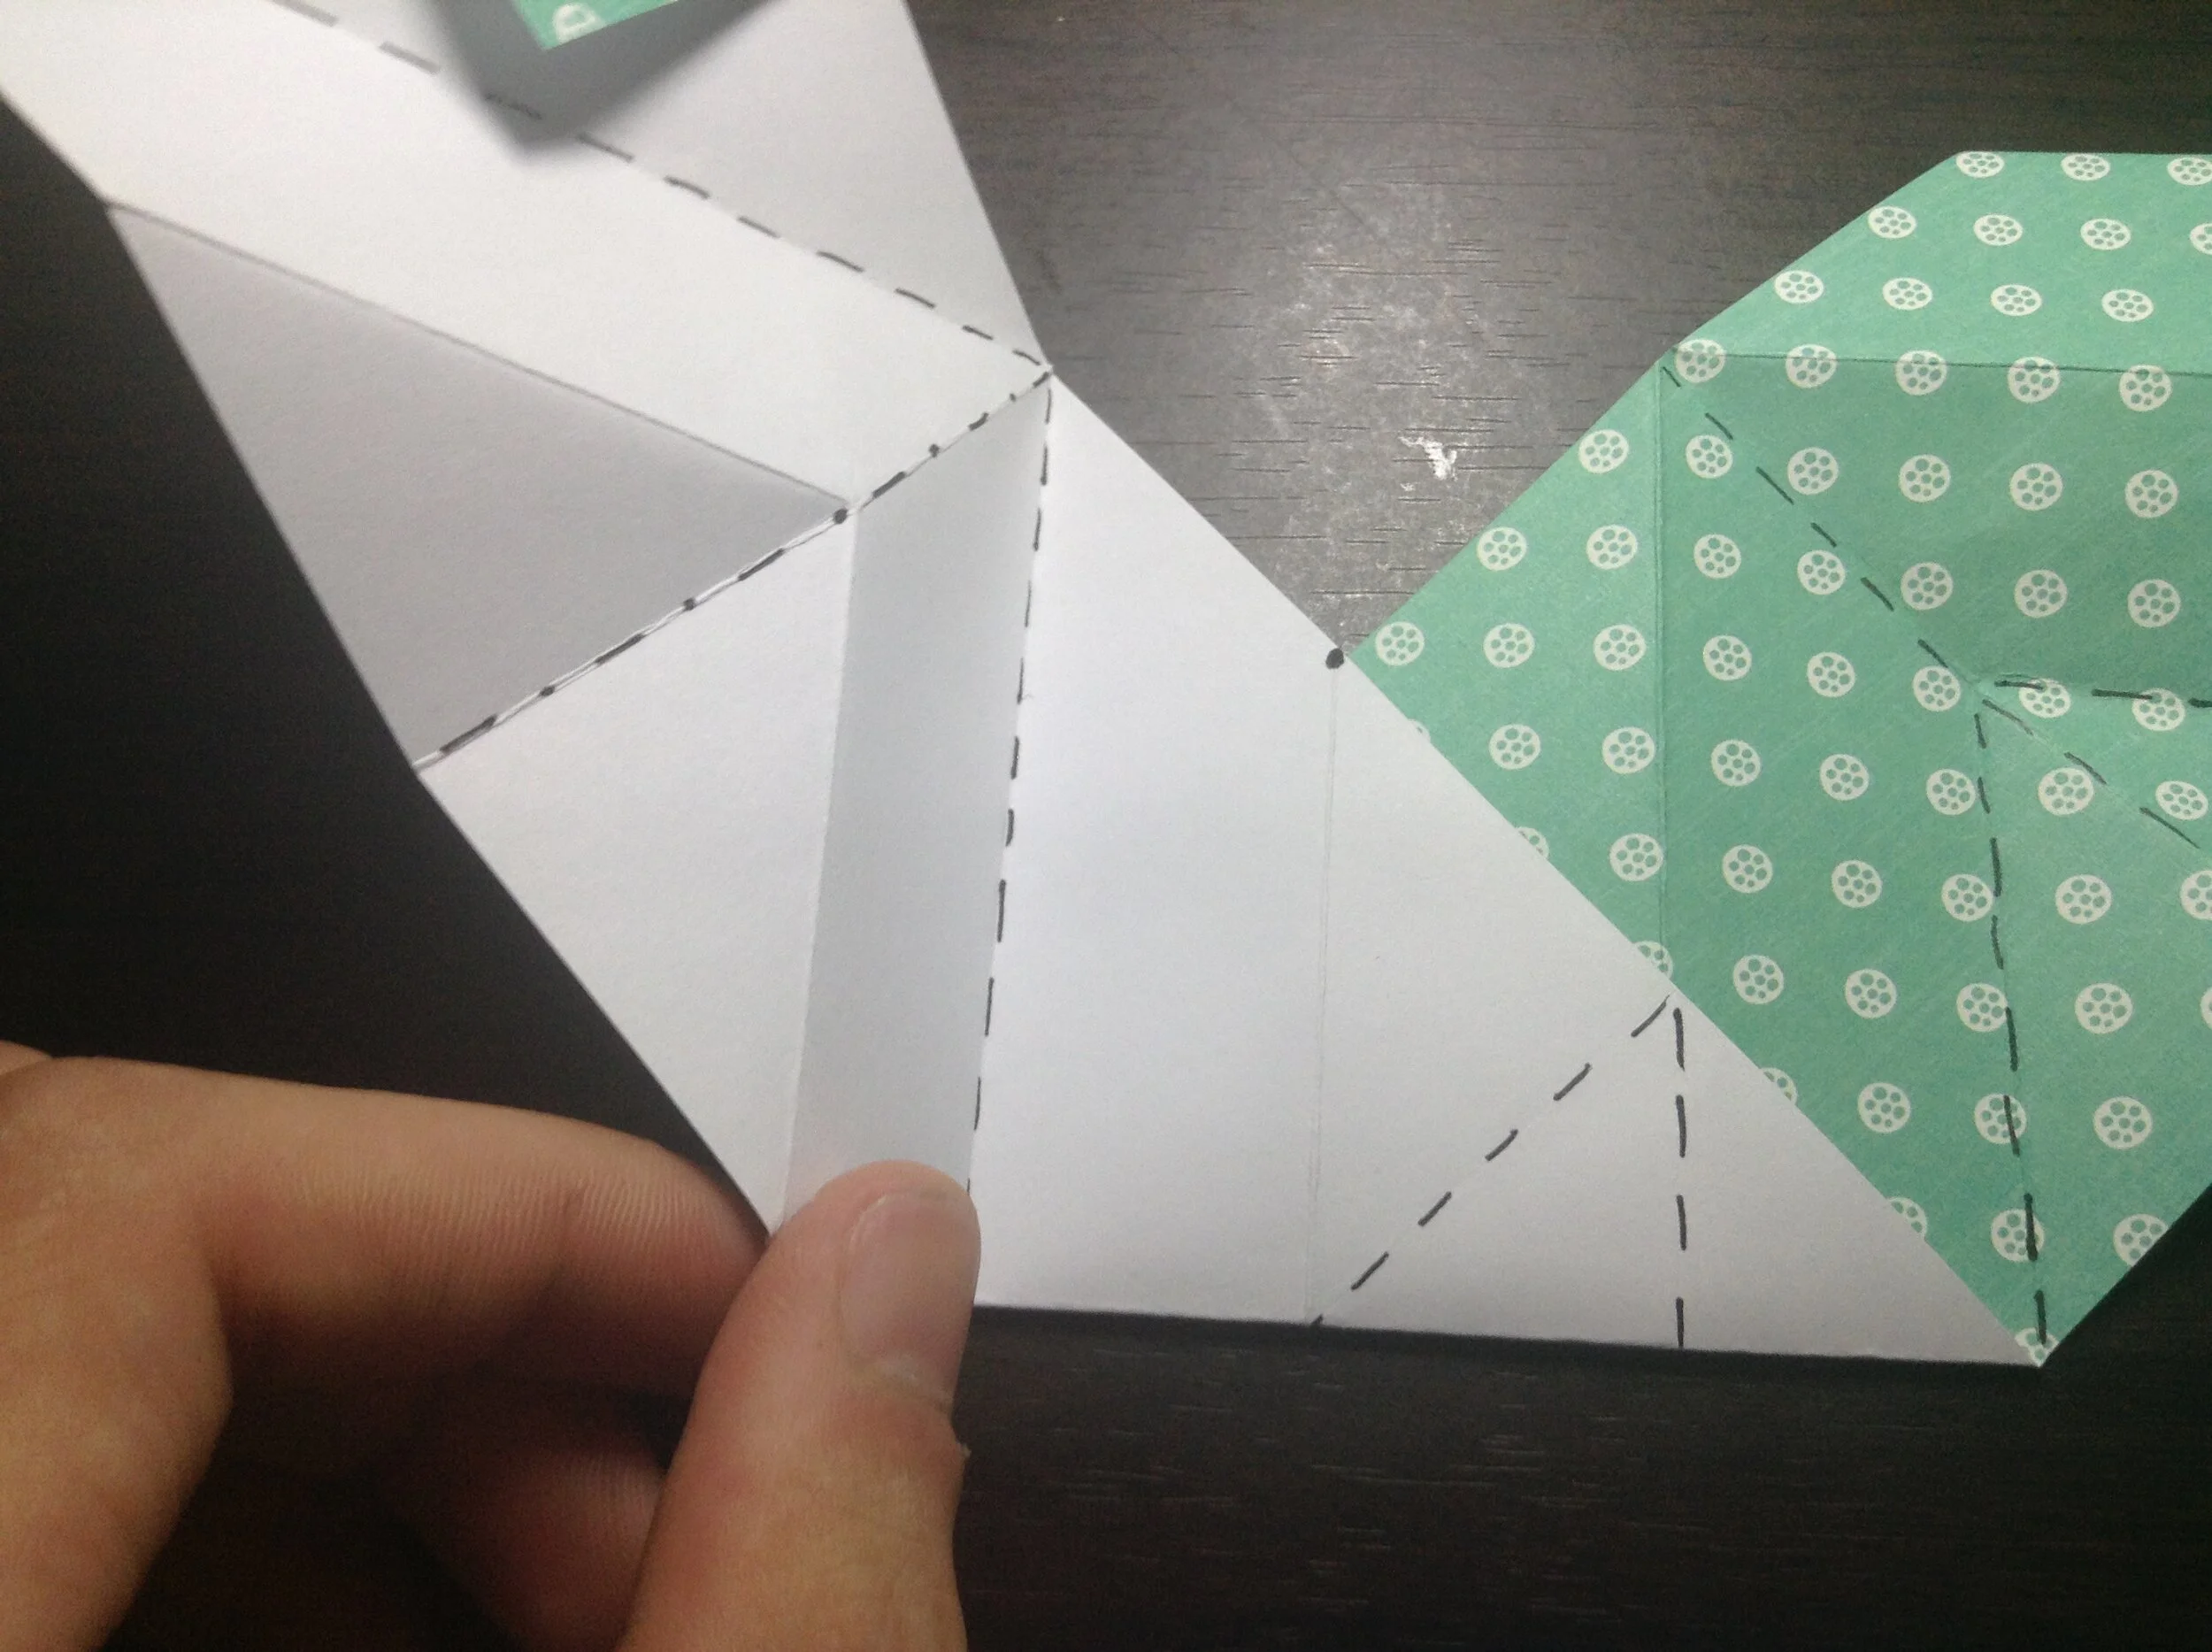
Step 9
Fold the ends of the middle diagonal to meet each other.
Step 10
Fold the left side in as shown.
Step 11
Repeat on the other side.
Step 12
Fold the small white triangle up as shown then unfold. Repeat on the other side. Unfold step 10 (on the front only).
Step 13
Swivel the front layer along the folds shown.

Step 14
Collapse the front layers again like in steps 4-7.
Step 15
Fold down the top crease and turn over.

Step 16
Fold the right corner to the centre of the large triangle.

Step 17
Next fold this flap in half.
Step 18
If you like this can be inside reverse folded, but that is optional. Repeat steps 16 and 17 on the side (you will have to unfold the layers first).

Step 19
Semi-fold the creases to form the complete unit.
Insert the flap into the pocket to assemble two units.
Two units fully connected.

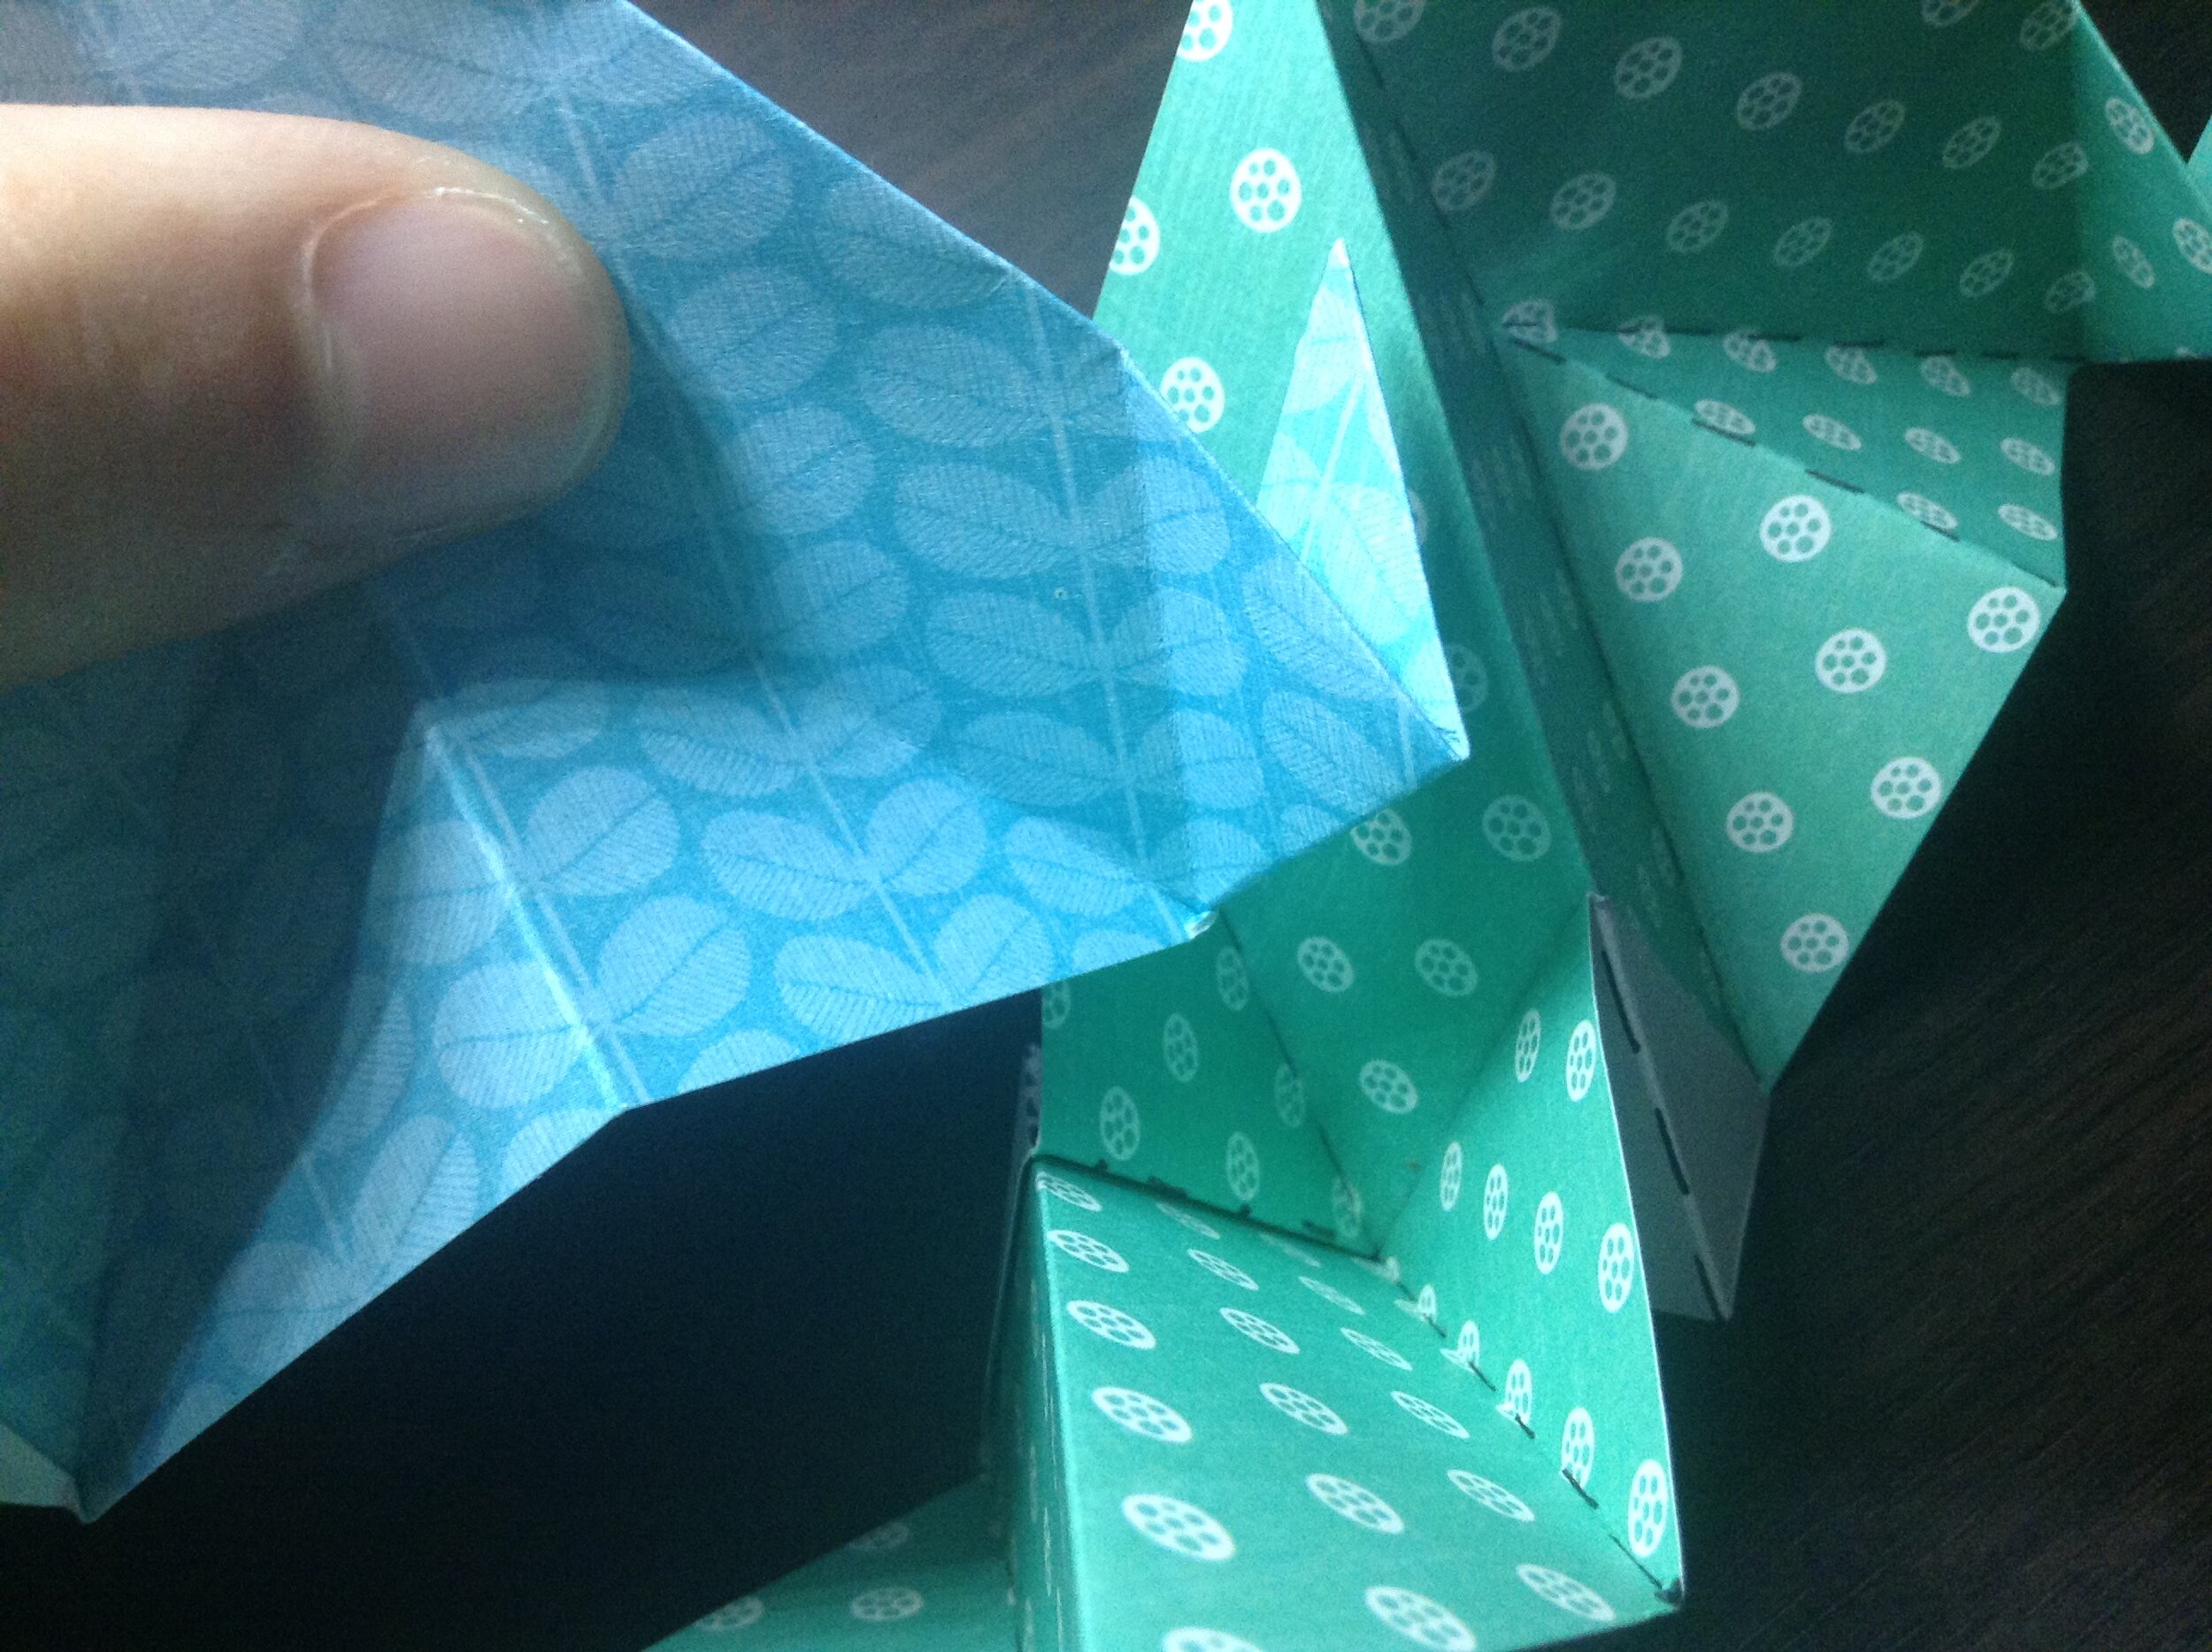
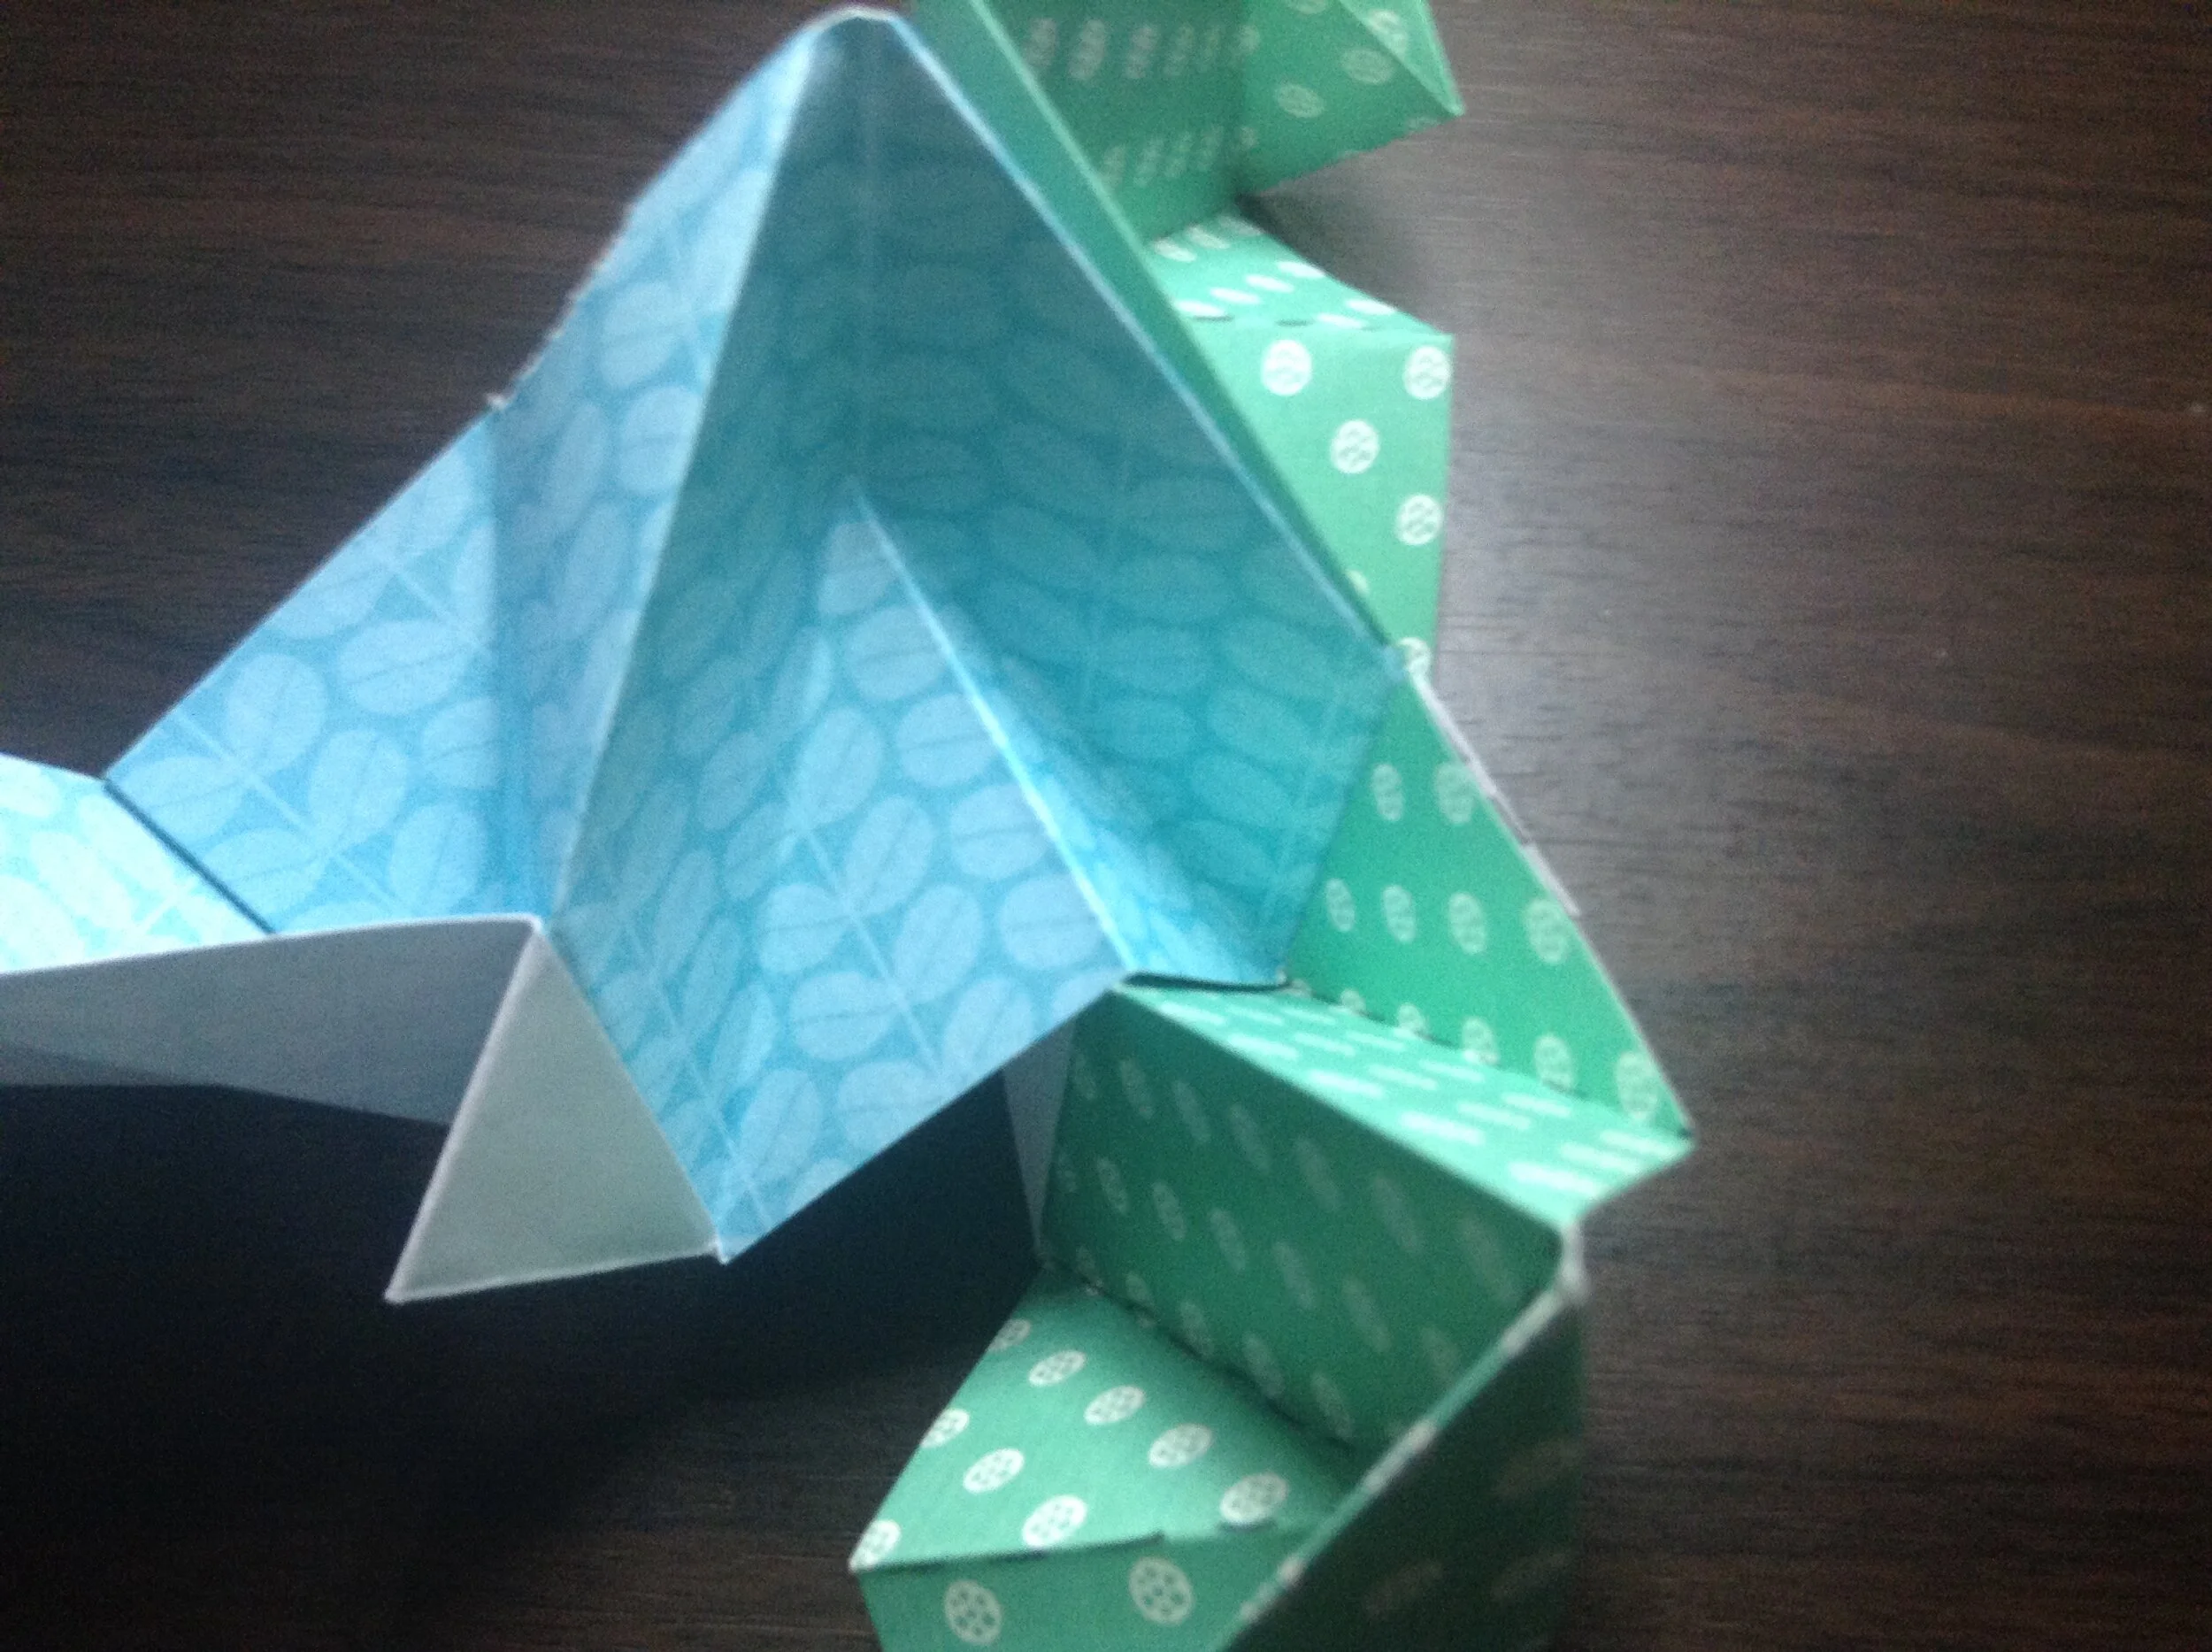
Connect a third unit to the first two like this. They will not sit right at the beginning, but as you continue the gaps will close.
Continue connecting units to create the 30 piece model. The pointy parts are arranged in groups of 5.